Easy Polymer Clay Christmas Ornaments
Here’s how to make easy polymer clay Christmas ornaments in the shapes of trees. Sculpey polymer clay is one of my favorite clays for making Christmas crafts, and today I’m sharing how to make easy polymer clay Christmas tree ornaments with crystals. These little trees look bright, classy, and perfect for holiday decor.
The steps are simple, and the clay is smooth and easy to shape. You can add small crystals for a pretty sparkle that stands out on any tree. This tutorial will walk you through the whole process so you can make your own handmade polymer clay Christmas trees at home.
I started making clay things a few years ago when I wanted a small handmade gift that still felt special. Over the years I’ve made many items with Sculpey clay like ring dishes and garden markers. I like adding different crystal colors for ornaments to give them some bling. These make sweet gifts for coworkers, family, or anyone who loves simple and pretty Christmas decor.
Easy Polymer Clay Christmas Ornaments
Now that you know what we’re making, let’s dive into creating these elegant polymer clay Christmas trees. We’ll be using Sculpey polymer clay to shape the trees and adding small crystals for extra sparkle. Since we’ll be using UV resin to seal the crystals, this is an adult craft and not for kids. If you want a kid friendly version, then swap the UV resin for a non toxic coating like Mod Podge gloss.
Supplies For Polymer Clay Christmas Ornaments
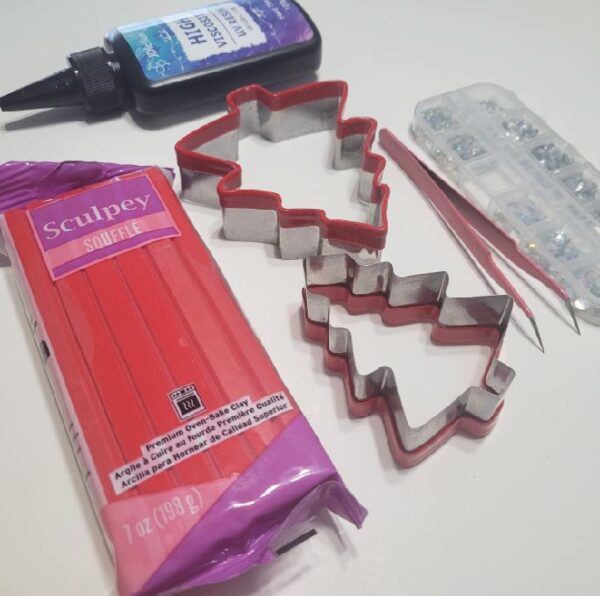
Sculpey polymer clay | Sculpey Amazon Store
Rolling pin or conditioning machine
UV resin for a protective coating
UV light for curing the resin
Steps For Polymer Clay Christmas Ornaments
Step 1: Choose Your Clay and Colors
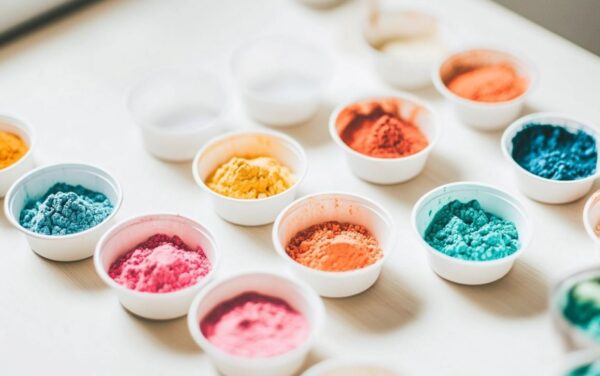
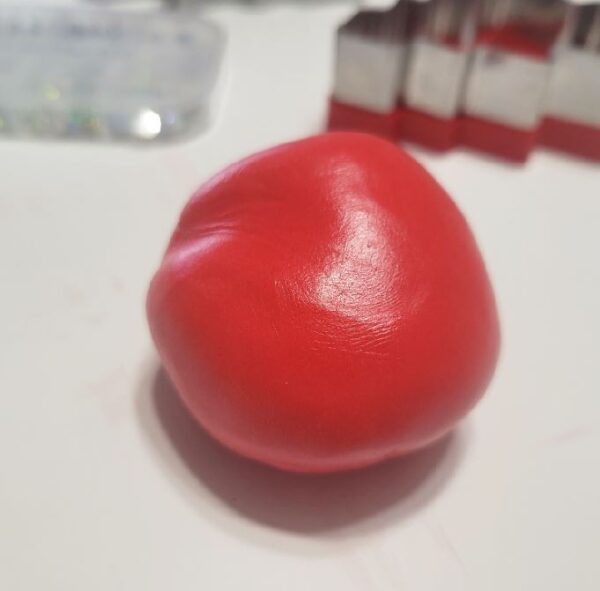
Start by picking the polymer clay you want to use. For this tutorial, I’m using Sculpey Soufflé in red, which comes in larger blocks perfect if you plan to make several ornaments at once. Choose colors that fit your holiday style. You can go classic green, soft pastels, or even metallic shades for a more modern look. Having a few different colors on hand can make each tree unique and more festive.
Step 2: Soften and Roll Out the Clay
Take your Sculpey Soufflé and knead it gently in your hands until it’s soft and easy to work with. This makes shaping much smoother and prevents cracks later. Once it’s soft, use a rolling pin to roll the clay out to about 1/4 inch thick. Try to keep it even so your Christmas trees will have a consistent shape and bake evenly. I like to roll my clay on a tile so that it doesn’t stick.
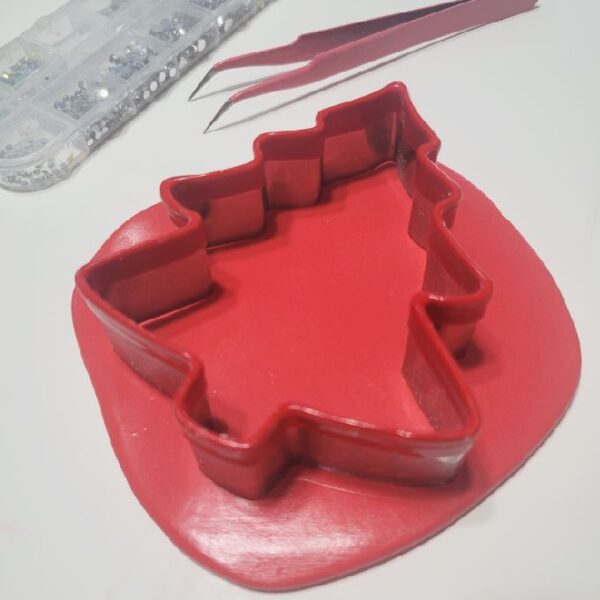
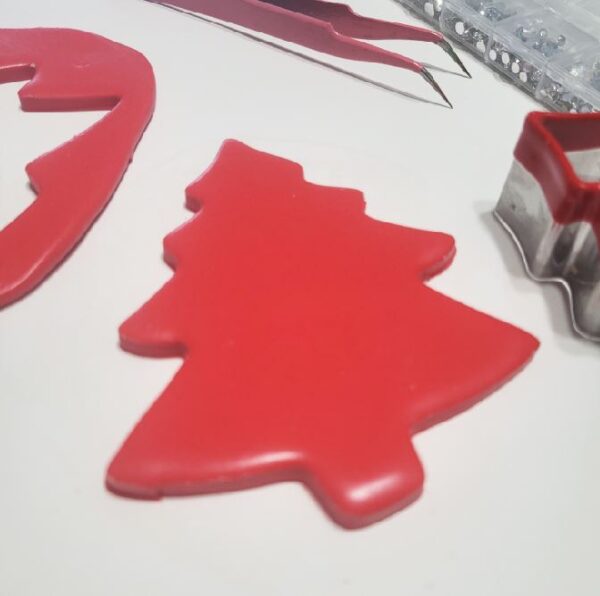
Step 3: Cut Out Your Tree Shapes
Use a Christmas tree cookie cutter to cut shapes from your rolled out clay. I like making a few at a time so I can bake several ornaments together. Press the cutter firmly to get clean edges. Keep the extra clay scraps to roll out again for more ornaments.
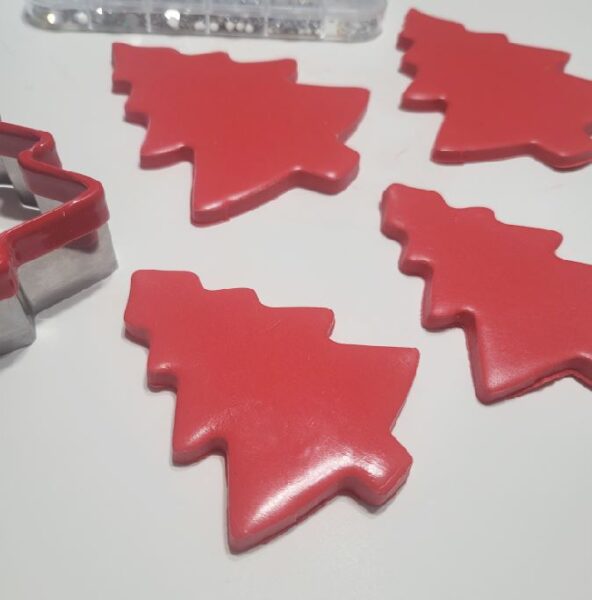
Step 4: Add a Hole and Embed Crystals
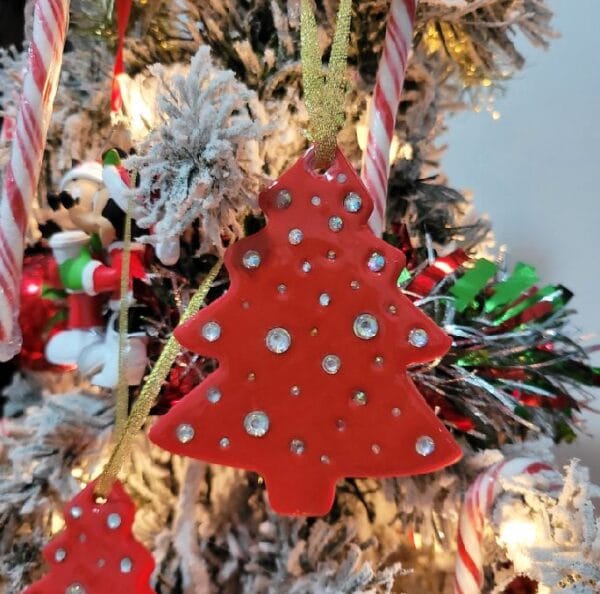
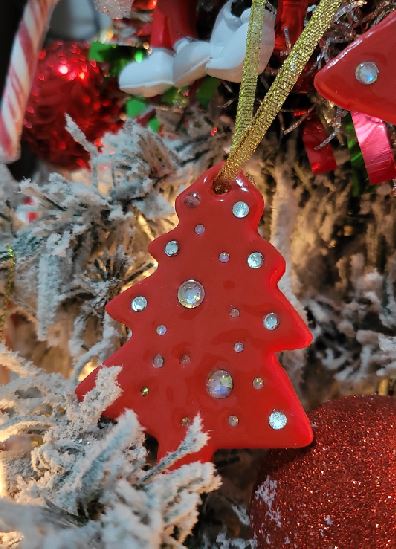
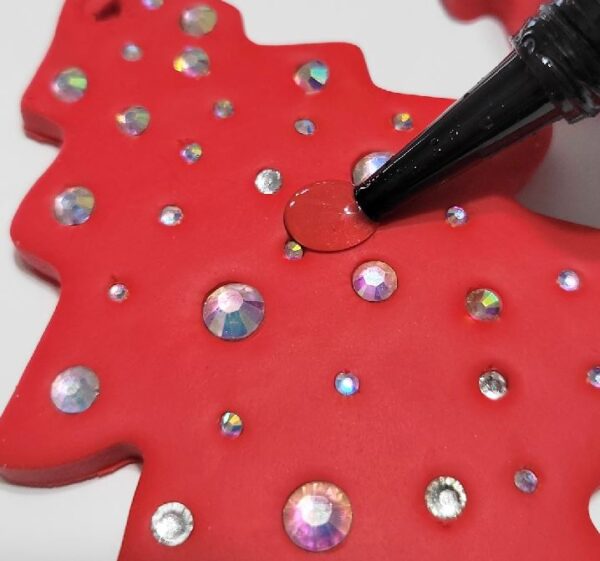
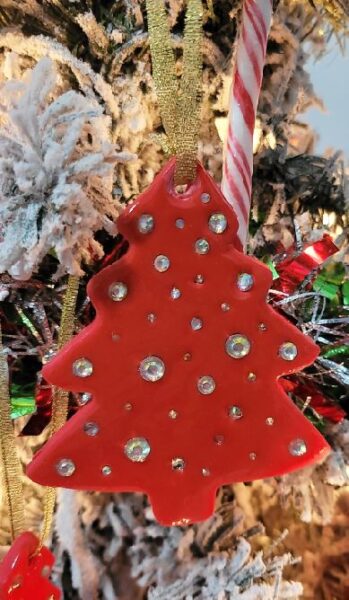
Before baking, use a toothpick or small skewer to make a hole at the top of each tree. This is where you’ll later add a string or ribbon for hanging. Next, start embedding your crystals into the clay. Press them in gently so they stick, but don’t flatten them too much. You want them to catch the light.
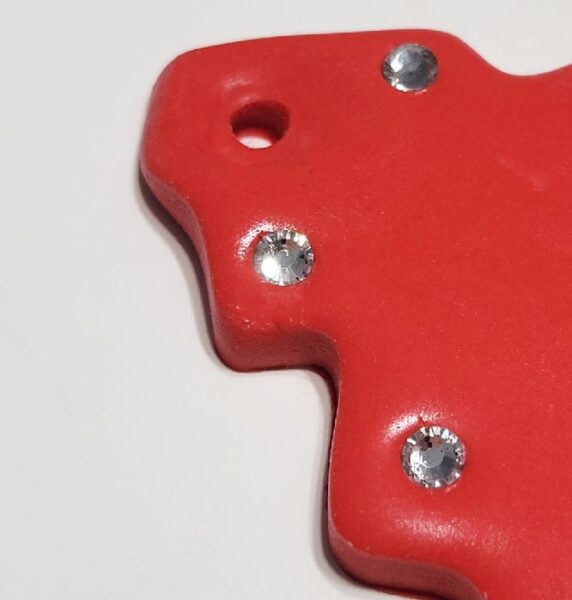
Sometimes you might choose to glue in the crystals after baking, but for this tutorial we’ll be coating them with UV resin instead of using glue, giving the ornaments a shiny, finished look. Arrange the crystals however you like to make each tree unique.
Step 5: Bake the Polymer Clay
Place your clay Christmas trees on a baking sheet and bake them according to the directions on your package. For these ornaments, I baked them at 275°F for 15 minutes. Once done, let them cool completely before moving on to the next step.
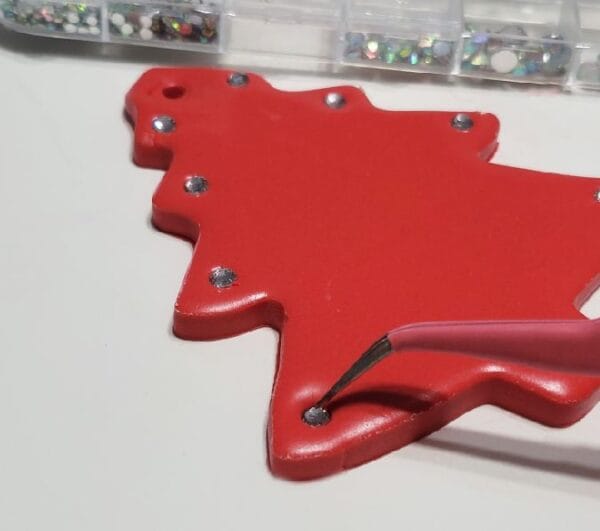
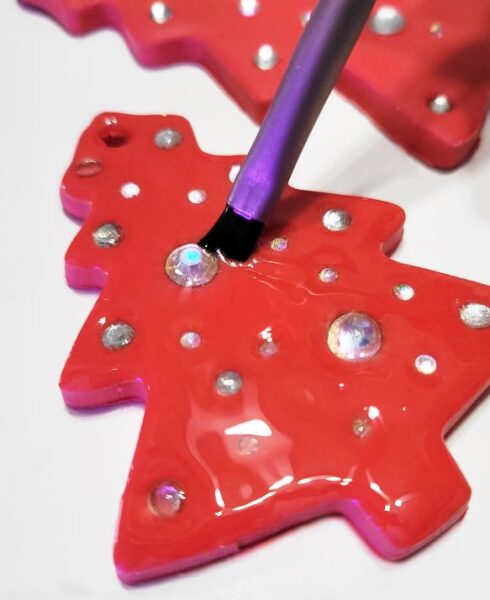
Step 6: Apply UV Resin
Once your clay trees are fully cooled, it’s time to seal the crystals with UV resin. Use a small brush to carefully coat the surface of each tree, making sure the resin gets into all the little crevices around the gems. This helps hold the crystals in place and gives them a shiny, polished finish. Take your time with this step so every crystal is secure and sparkling beautifully. Be careful not to flood the hole at the top that you will need for the ribbon.
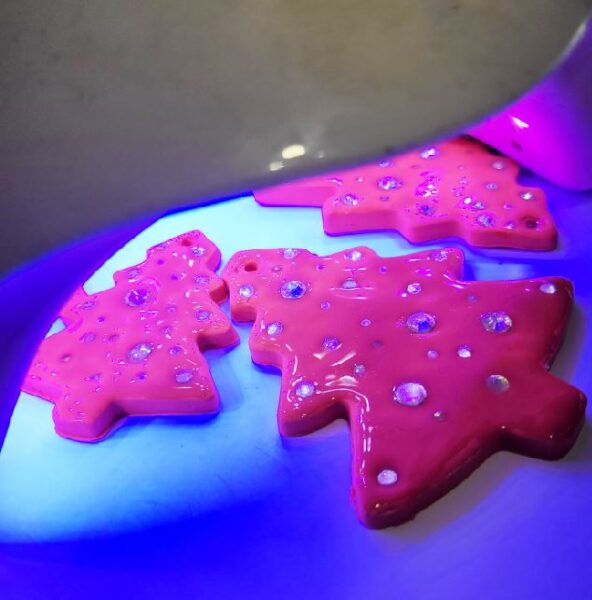
Step 7: Cure the UV Resin
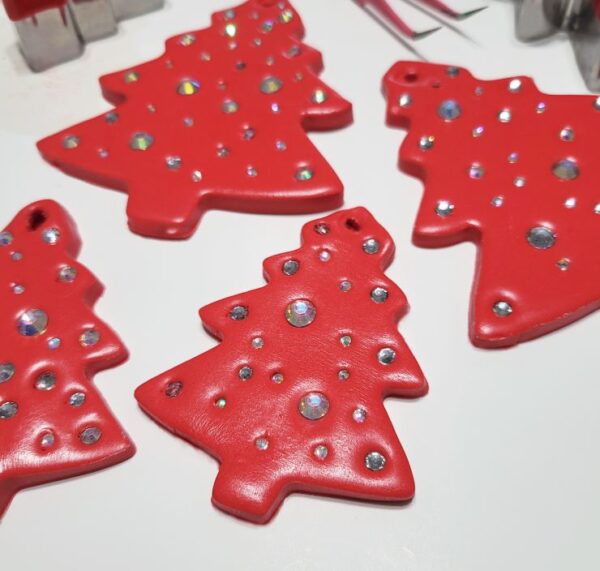
After applying the resin, place your ornaments under a UV lamp to cure. Follow the lamp’s instructions for curing time, usually a few minutes, until the resin is fully hardened and glossy. Make sure the resin is completely set before handling the ornaments so the crystals stay in place and the finish stays smooth and shiny.
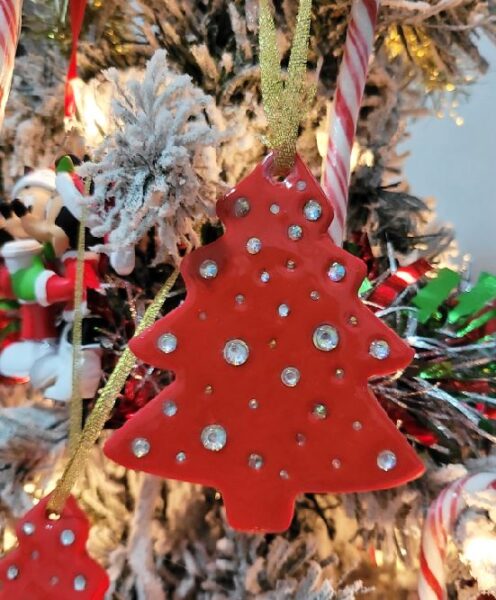
Step 8: Add Ribbon and Finish
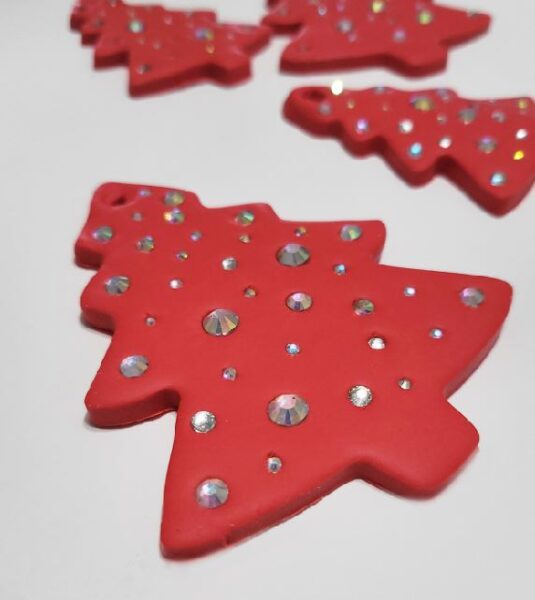
Once the UV resin is fully cured, thread a ribbon or string through the hole at the top of each tree. Tie a knot or bow to create a hanger, and your ornaments are ready! Now you can enjoy them on your own tree or package them up as thoughtful handmade gifts. These sparkling polymer clay Christmas trees make a simple but beautiful holiday decoration anyone will love.
I hope you enjoyed this DIY for making Christmas tree ornaments with crystals. These handmade ornaments are simple to create, shine beautifully with the UV resin finish, and make thoughtful gifts or festive decorations for your home. If you try this tutorial, I’d love for you to share your creations and this article with friends so more people can enjoy making their own polymer clay Christmas ornaments. Happy crafting and happy holidays!