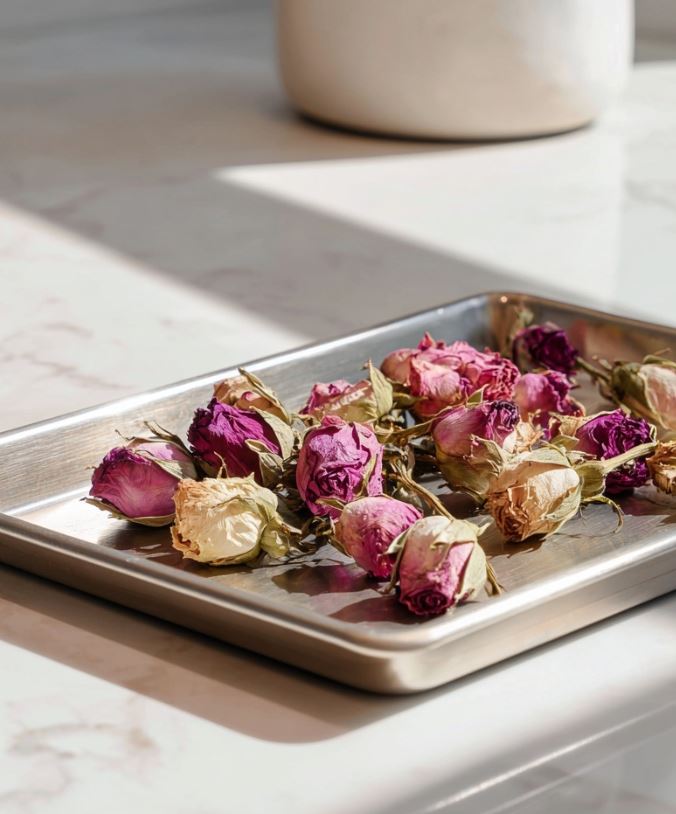
11 Ways To Dry Flowers For Epoxy Resin
Here are the best ways to dry flowers for epoxy resin. Drying flowers for epoxy resin is a simple way to save your favorite blooms and turn them into beautiful keepsakes. When flowers are dried the right way, they hold their shape, color, and delicate details inside resin projects. Learning how to dry flowers for resin helps you create jewelry, coasters, trays, and home décor that feel personal and meaningful. With a few easy ways to do this, you can prep fresh flowers so they are ready to use in your epoxy resin crafts.
If you love saving flowers from special moments or from your own garden, this is where you get started. There is something so satisfying about seeing a bloom you dried yourself sealed inside a clear resin piece. It feels creative and calming at the same time. I will walk you through simple steps so you can dry your flowers with confidence and start making resin projects you are proud to display.

This guide will show the easy ways of drying flowers so that they will be completely dry and have no more moisture left. You can then go ahead to use in your resin creations like making coasters, resin flower trays and resin jewelry.
If you want to create pressed flower art, make personalized keepsakes, or simply enjoy their vibrant colors and delicate forms, there are many ways you can try on this list. Some of these ways will dry flowers quickly and then others will take longer, like drying your flowers inside books.
How To Dry Flowers For Epoxy Resin
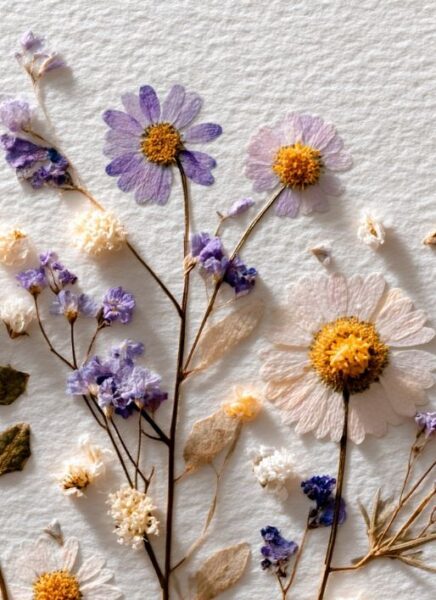
1. Press Flowers In A Book
One of the most easy ways is to press flowers between the pages of a heavy book. This will dry out flowers for resin but will take a while. Place the flowers between two pieces of absorbent paper, close the book, and add some weight on top. Leave them undisturbed for a few weeks to allow them to dry flat. One they are done, you can store the dried flowers for resin in a container with a lid. Do make sure they are completely crispy or they can grow mold.
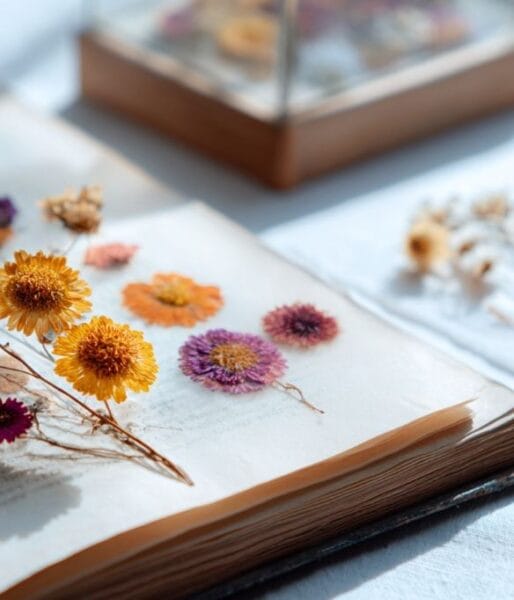
Drying flowers in a book typically takes two to four weeks, depending on factors such as the flower type, size, and environmental conditions. Pressing flowers between book pages allows for a gradual preservation. This results in beautifully dried blooms that are completely dried out. It’s best to choose flowers with relatively flat petals, such as daisies, pansies, or violets. These types flatten more easily.
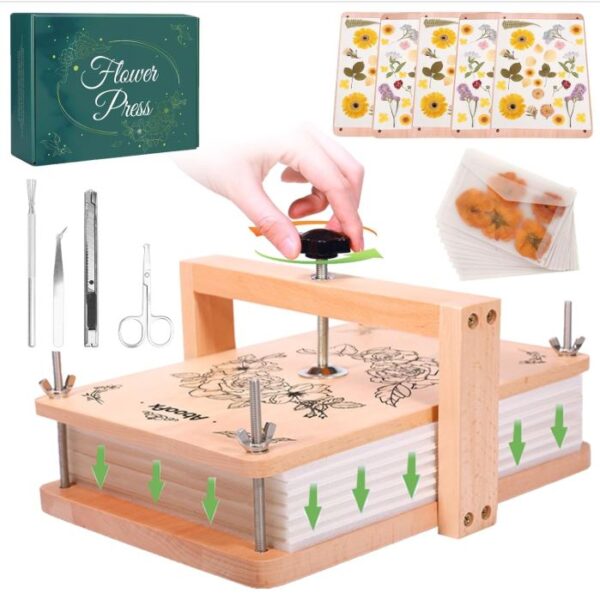
2. Dry Flowers Using A Press
Using a flower press like the ones from Aboofx applies steady, even pressure that flattens petals while pulling out moisture over time. The layered design let’s air get between sheets, which helps blooms dry thin and smooth. This way works best with flowers that have naturally low moisture content and simple shapes. Most pressing takes one to three weeks depending on thickness and humidity.
3. Microwave Drying Flowers
Microwaving is a quick way of drying flowers of larger sizes. While using a microwave to dry flowers is possible, it’s important to do this very carefully. Microwaving flowers for drying is a quick process. Note that it may not preserve their color and shape as well as air drying.
Place the flowers between two pieces of paper towel and put them in a microwave for short bursts of about 30 seconds at a time. for about 2 minutes Check the flowers after each burst until they reach the desired level of dryness. By placing flowers between layers of absorbent paper and microwaving them in short bursts, the heat gently removes moisture.
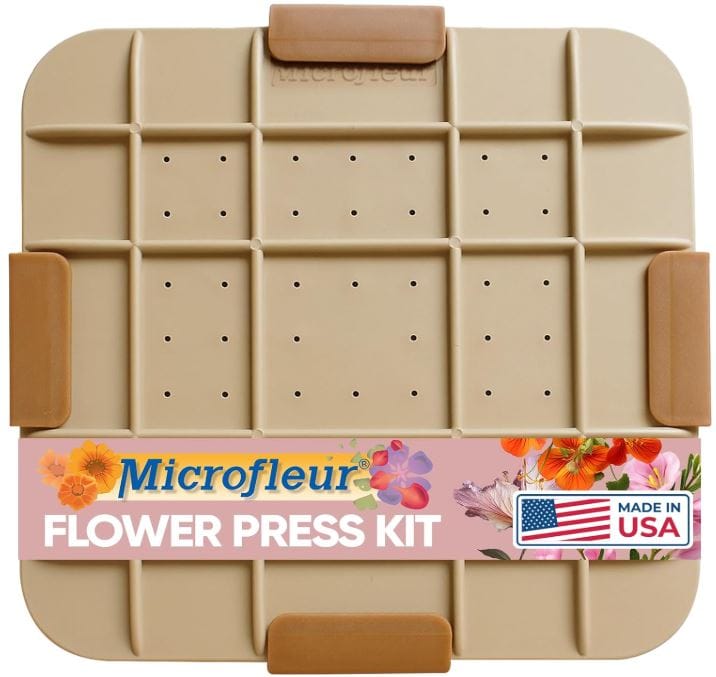
4. Microwave Flower Presses
A microwave flower press speeds up the drying process by using gentle heat to pull moisture from petals in minutes instead of weeks. Specially designed plates and cotton liners help control steam so blooms dry flat while keeping much of their natural color. One brand I have had before is the Microfleur flower press, which is made specifically for the microwave. Dry time depends on the thickness of the flower and the power level of your microwave, so short heating intervals work best.
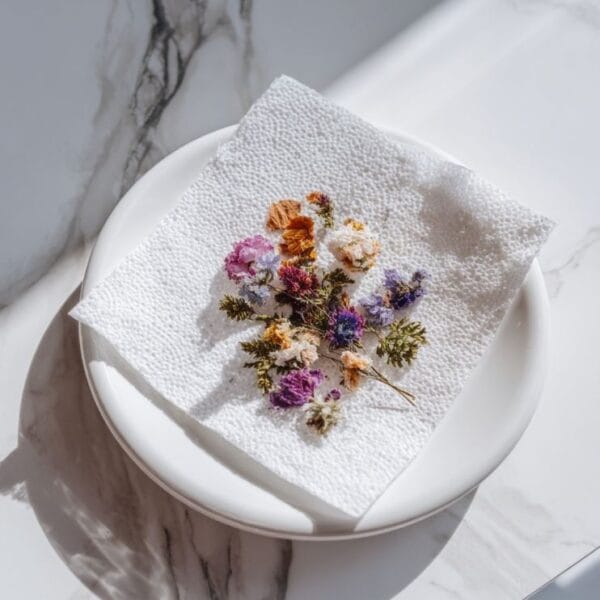
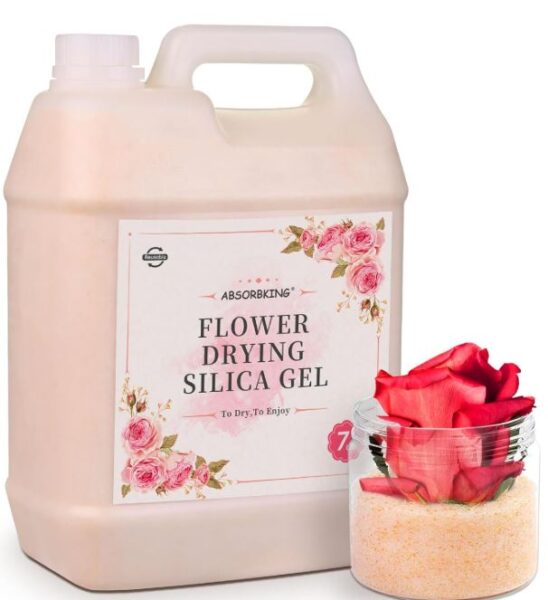
5. Silica Gel For Flower Preservation
Silica gel crystals draw moisture out of blooms while helping them keep their original shape and texture. Flowers are placed in an airtight container and gently covered so every petal is supported during the drying period. This method works well for fuller blossoms because the tiny beads surround each layer and reduce shrinkage. Most varieties dry within a few days to one week depending on size and density.
6. Ironing Fresh Flowers For Drying
Pressing blooms with an iron uses steady heat and absorbent paper to remove moisture quickly. Petals are placed between sheets of parchment or plain paper, then warmed in short intervals without steam. The warmth pulls out dampness while keeping the surface flat and smooth. This works best for thinner varieties that can handle direct heat without browning.
7. Freeze Drying Flowers
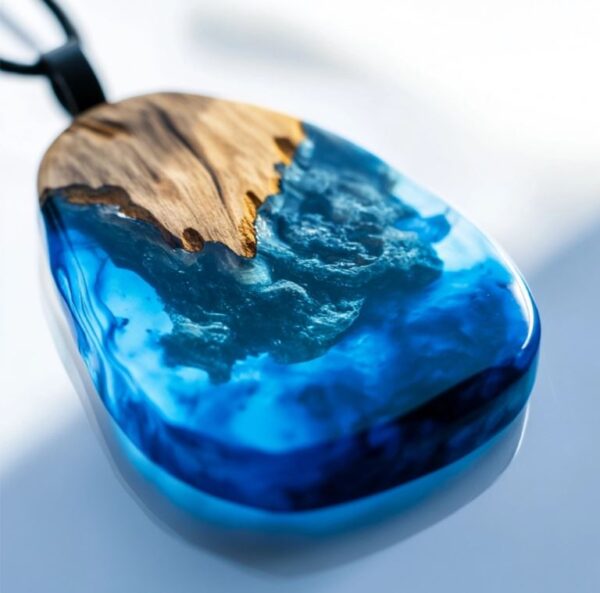
A freeze drying machine removes moisture by freezing blooms first, then pulling water out through a vacuum process. This keeps the original shape, texture, and much of the natural color because the water leaves as vapor instead of liquid. Flowers stay three dimensional rather than flat, which makes them great for epoxy tables. Dry time depends on the size of the load and the thickness of each stem. Freeze drying is extremely popular and you can offset the costs by making things to sell at craft shows.
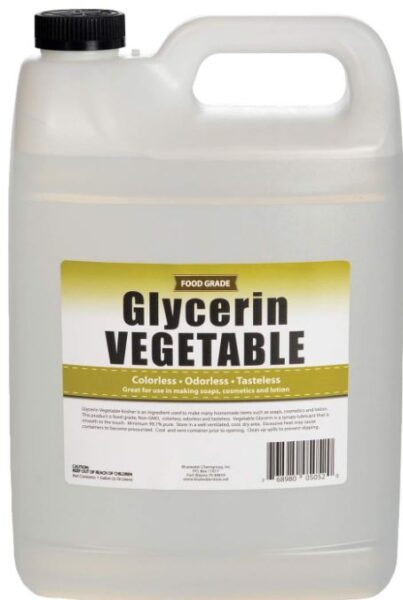
8. Glycerin Preservation
Glycerin for flowers replaces the natural sap inside stems, keeping foliage soft and flexible instead of brittle. Stems are trimmed and placed in a mixture of 1 part glycerin and 2 parts warm water so the solution travels upward through the plant fibers. Over about a week, the liquid changes the texture and deepens the tone of leaves and some blossoms. This technique works best for greenery and sturdy varieties with strong stems.
9. Air Drying Flowers
Hanging flowers upside down in a warm, airy spot slowly pulls out the moisture while keeping the stems straight. Over time, the petals dry naturally, keeping their shape and soft details. Some colors may deepen as they dry, giving the blooms a charming, slightly rustic look. This works really well for flowers with stronger stems that can hold themselves upright. It usually takes a few weeks for the flowers to completely dry, but it’s important to periodically check on them to make sure they are drying properly and not developing mold or rot.
10. Oven Drying Flowers
Oven drying dries flowers quickly by using low heat in your kitchen oven. Start by spreading blooms on a baking sheet lined with parchment so they aren’t touching. Set the oven to around 150 degrees Fahrenheit and check them every 30 minutes. Most small to medium flowers take about two to four hours to fully dry, depending on their size and thickness. Once they feel crisp and dry, let them cool completely before handling.
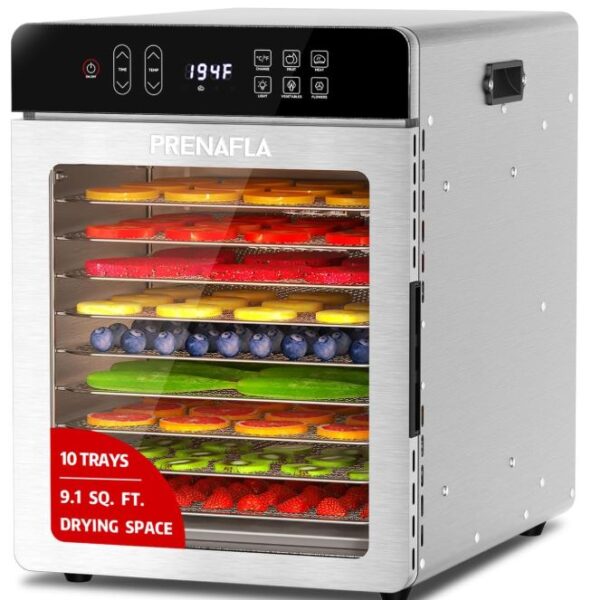
11. Dehydrator For Flowers
A food dehydrator dries flowers by circulating warm air evenly around the blooms, pulling out moisture without flattening them. Spread the petals or small stems on the trays so air can move freely, and set the temperature low to gently dry them over several hours. Most flowers are ready in four to eight hours depending on size and water content. If you plan to do this often, it’s a good idea to get a dehydrator just for crafting so your kitchen foods don’t mix with your flowers.
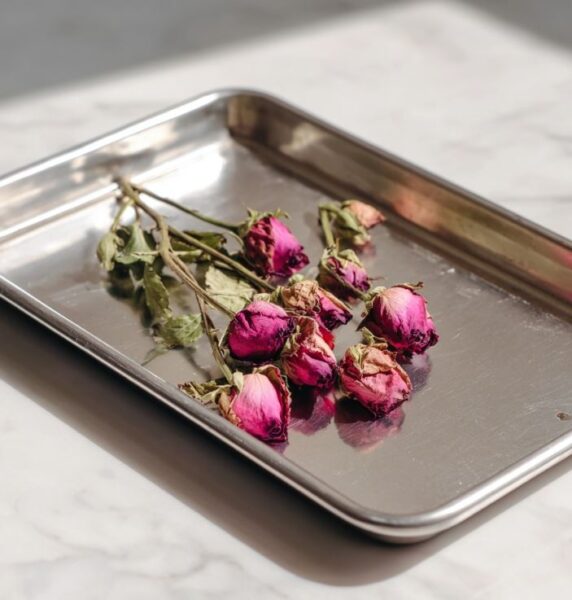
Most popular flowers to dry for Epoxy resin
- Roses
- Baby’s breath
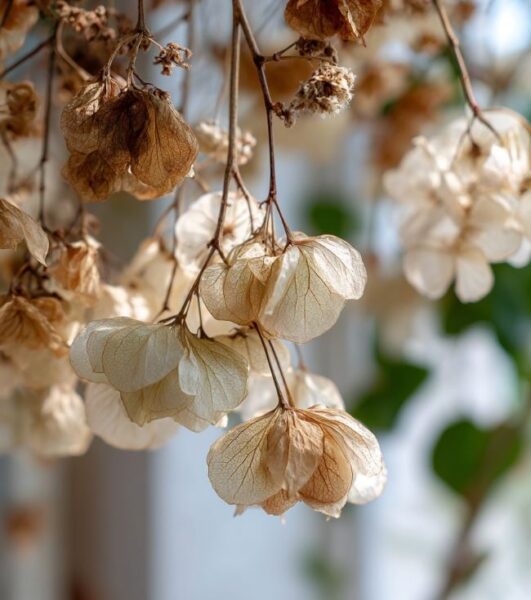
- Hydrangeas
- Pansies
- Violets
- Daisies
- Lavender
- Marigolds
- Fern leaves
- Forget me nots
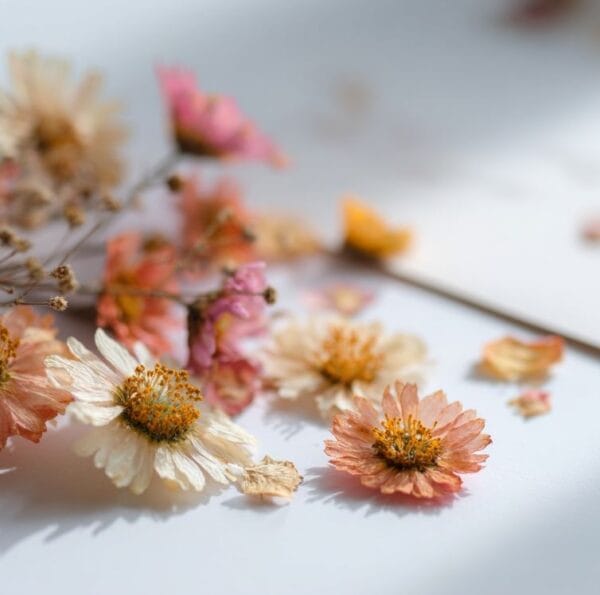
Tips for preserving flowers
Start With Moisture Free Flowers
Always make sure your blooms are completely dry before putting them in resin. Any leftover moisture can cause bubbles or cloudiness, so drying flowers thoroughly is key to clear, long lasting results.
Flower Size and Thickness
Smaller flowers or petals with thin layers work best in resin because they dry evenly and fit neatly into your designs. Thick or bulky blooms can trap air or resin, which might create tiny gaps or bubbles. If you want to use larger flowers, you might have to trim or split them so each piece lays flat and fits smoothly in your project.
Seal Dried Flowers Before Resin Casting
Brushing or spraying a thin layer of clear sealer on dried flowers helps protect them from resin moisture and keeps colors bright. It also makes delicate petals less likely to crumble or tear when you handle them. A light coat is enough, too much can change the texture or make the bloom look stiff.
Don’t use High Moisture Flowers
Steer clear of flowers that are naturally high in moisture content, as they may not fare well in resin. Examples include succulents or flowers with fleshy petals. They just don’t dry well and will eventually rot in the epoxy.
Thanks so much for reading! I hope these tips help you get started with drying flowers and creating resin projects you love. Have fun experimenting and making pieces that feel personal and full of color. Happy crafting.
More Epoxy Articles