17 Epoxy Resin Egg Ideas To Make
Here are some resin egg ideas to make. Resin eggs are such a fun and creative project for crafters of all levels. You can make them colorful, sparkly, or even filled with tiny decorations to match any season or holiday. Using epoxy resin, glitter, pigments, and small charms opens up endless possibilities for unique designs.
In this guide, I’ll share a list of resin egg ideas to inspire your next craft project and help you create eggs that are perfect for decorating, gifting, or selling. With a little resin and imagination, you can make eggs that really stand out.
You’ve probably tried a few resin projects before, and now it’s time to take it to something new and fun. Making resin eggs is a little different from flat pieces, and it’s exciting to see how the colors and decorations come together in a three dimensional shape. These ideas will give you inspiration to play with colors, textures, and little surprises inside each egg. So, get your resin supplies ready, and let’s get into some inspiring resin egg creations that you can make with epoxy resin.
best Resin egg ideas
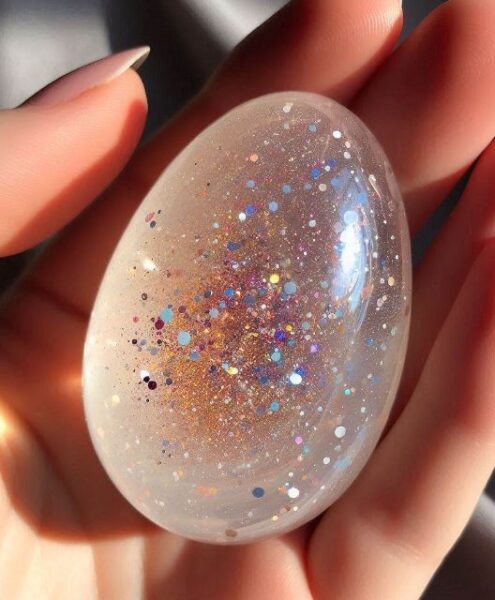
1. easy glitter epoxy egg
A simple resin egg with clear resin and glitter. To make this one, mix your epoxy and add the glitter into the mixed resin. Then pour it into your egg mold. Voila!
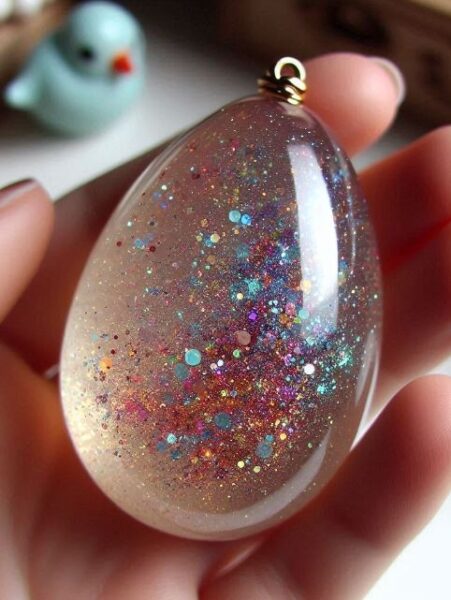
2. epoxy egg ornament
A gorgeous resin egg with glitter that can be hung as an ornament. These make great gifts and can also be customized even more by adding charms or rocks inside.
3. Everything resin eggs
You can embed many different things into resin to create crazy and fun eggs. Use polymer clay slices, charms, fake food, jewelry supplies and more.
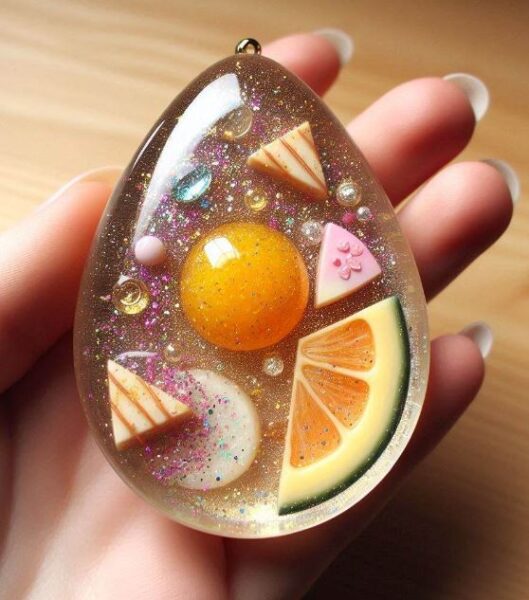
There is one shop on Etsy that has so many inclusions for resin. Check out Happy Kawaii Supplies. They literally have everything for resin.
4. Resin Rock eggs
Start collecting different sizes of rocks to embed into your resin eggs. Some ideas will be fish tank rocks, river tocks or tumbled rocks. Use resin pigment paste to give sections some extra color.
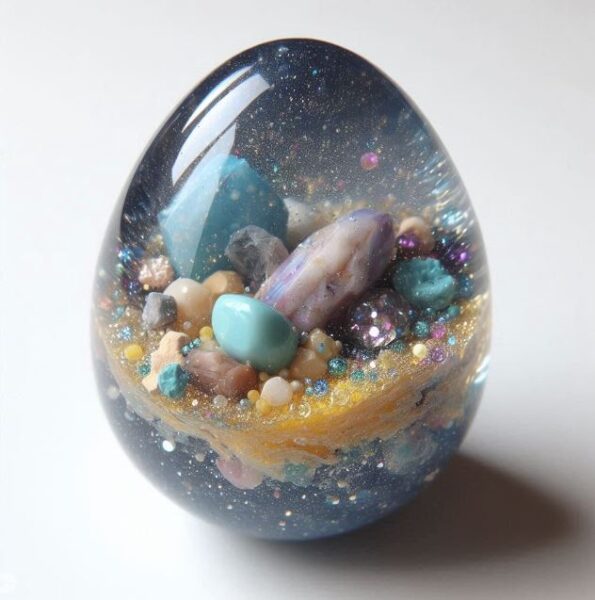
5. Geode Epoxy eggs
You can embed crystals and gems to create your own geode type eggs. So many possibilities and you can get them in bulk on Amazon.
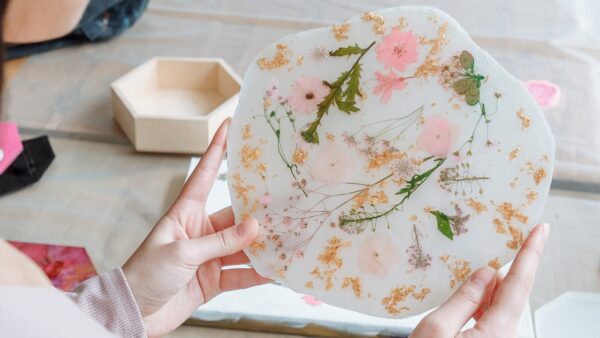
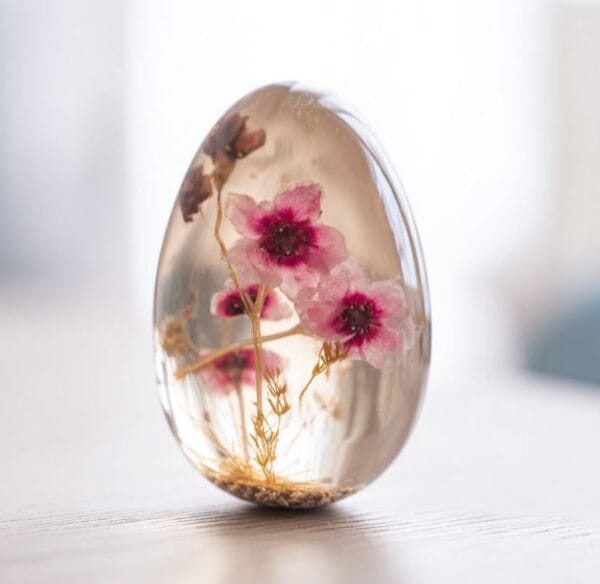
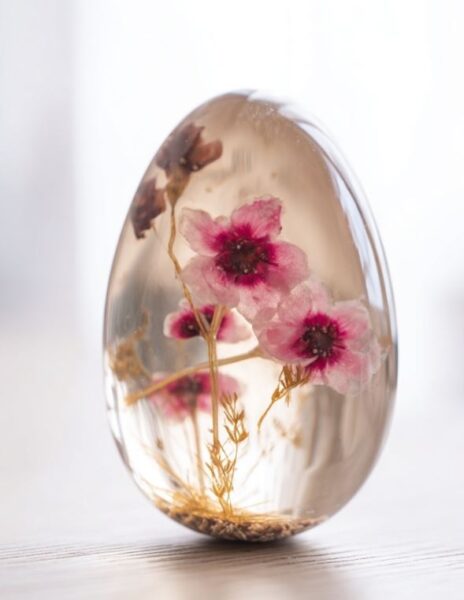
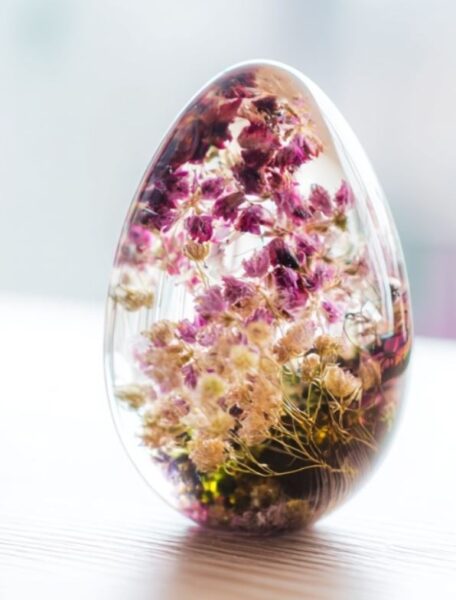
6. Flower resin eggs
Flower resin eggs are so pretty. There’s many ways to get this look. Either use real dried flowers, or you can use fake polymer clay flowers and inclusions. If you are using dried flowers, they must be totally dry before putting them in resin. Here is a helpful article about how to dry flowers for epoxy resin.

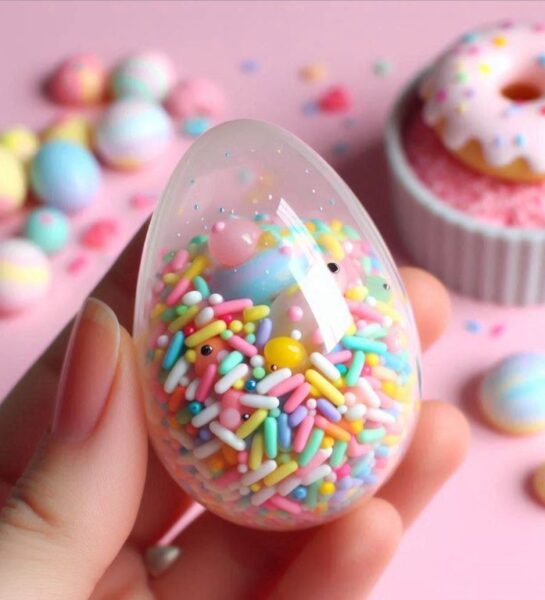
7. Sprinkle Resin eggs
Little sprinkles make this egg so adorable, just like a Kawaii Easter egg. These sprinkles are made from little tiny pieces of polymer clay.
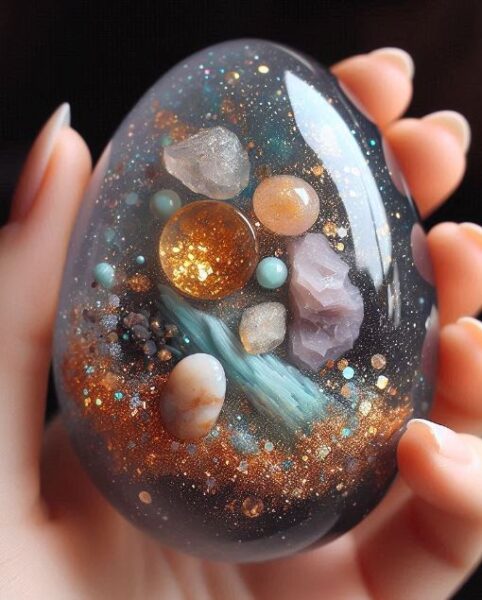
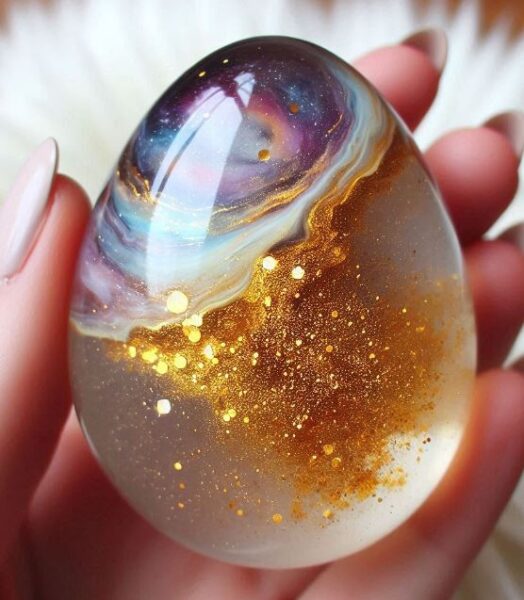
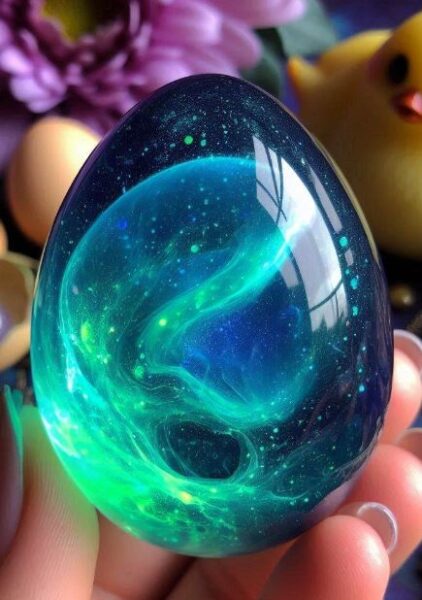
8. Gold galaxy resin egg
Gold glitter and pigments are swirled into this egg to create a cool galaxy themed egg. Using both chunky and find glitters will give you more interest in your eggs. See this article about the best golds to use in resin if you like the gold theme.
9. Jewelry resin eggs
So many cool designs can be created with inclusions and glitters. Stars, gold dots and transparent pigments create a gorgeous world inside epoxy eggs that you can wear as jewelry.
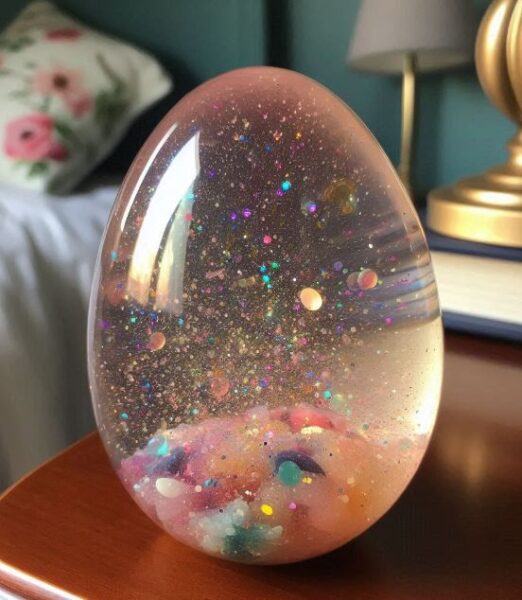
10. Colorful resin egg
Make a colorful egg with different types of glitters and small rocks. Fish tank rocks or small tumbled rocks are perfect for this.
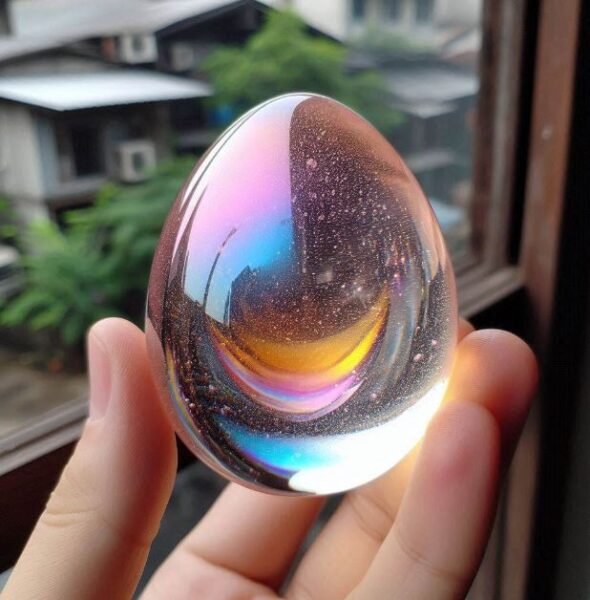
11. transparent epoxy egg
By adding just a hint of alcohol ink colors, you can really make some cool effects that are transparent. When using alcohol inks in resin a little goes a very long way. So instead of dropping the inks in, try using a stir stick to add just a tiny bit and see if you like that first. Then you can add more if you need to.
12. Gold Alcohol ink resin egg
To get this look, you will need gold alcohol ink. Prepare the resin and pour it into the mold. Then take a tiny bit of gold alcohol ink and gently stir it into the middle. By not completely mixing it in, it will spread a bit and make some really gorgeous designs.

13. Glow in the dark resin egg
Glow in the dark powder is so fun to use in resin art. A little goes a long way too. And it’s not very expensive. You will need to charge up the egg by putting in light so that it will glow at night. Check out these glow in the dark pigments for resin.
14. White & Gold resin egg
This one is my favorites, it has white paint and gold glitter in it. When you put it by the light, the glitters look like they are lit up. The white swirls are so pretty.
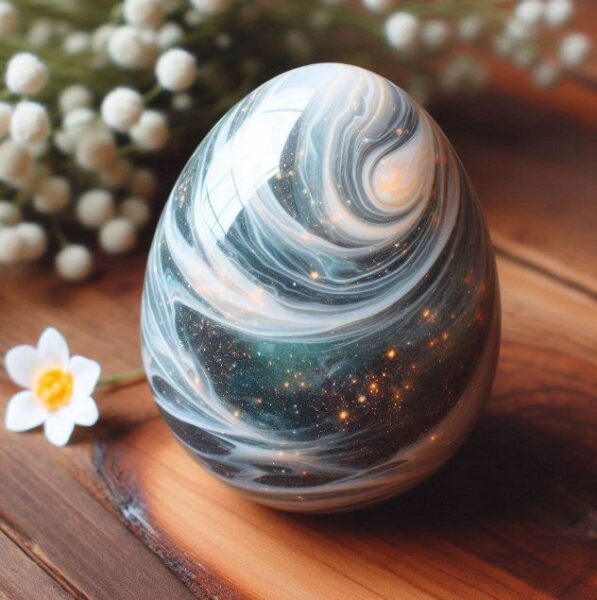
15. Blue & White resin egg
With some blue and white pigments, you can create an easy epoxy egg that is good for beginners to try. For this, mix the resin and then add the blue pigment and mix until you get the desired look. Next, add in the white pigment and mix just until it makes swirls. Not too much or it will mix in with the blue and just look like a light blue egg. Then pour this mixture in the resin mold.

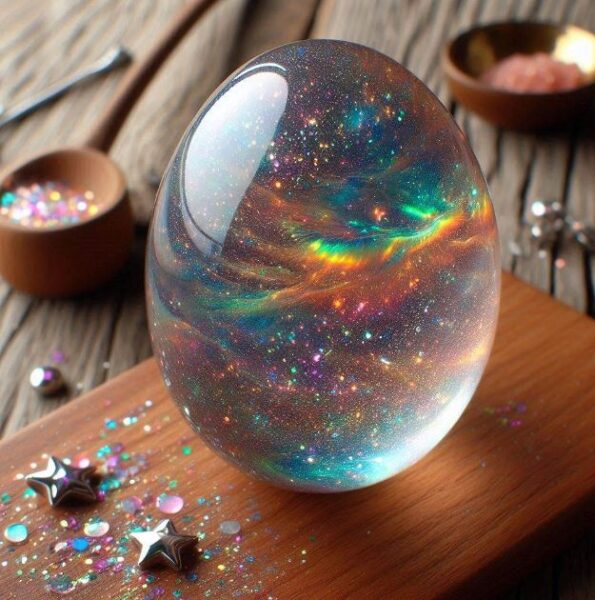
16. Glittery Holographic egg
This epoxy egg idea is really cool because you can use glitter and holographic powders to create different effects. I get really excited about all of the possibilities for making resin creations. This article about the best colorant ideas for resin has some really neat color changing powders to check out.
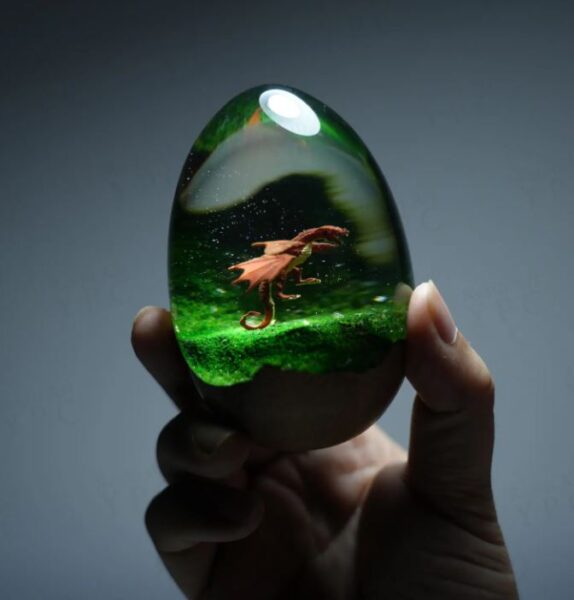
17. Dragon resin egg
Lastly, here is an egg that is handmade with a magical dragon in it. I love this shop, they have so many cool resin egg ideas!
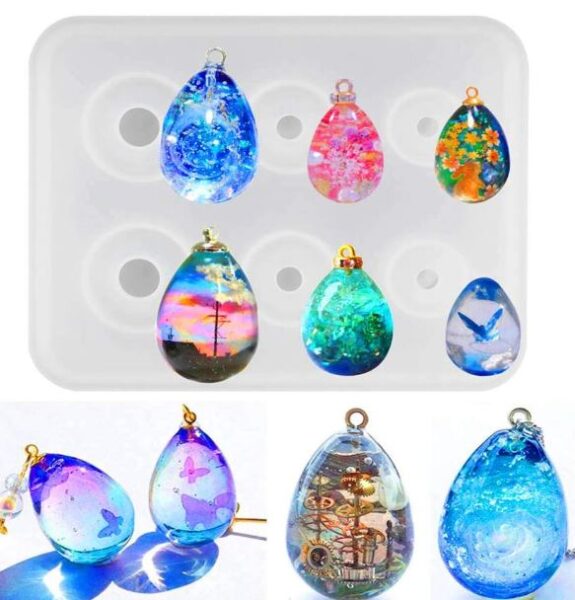
how to make a resin egg
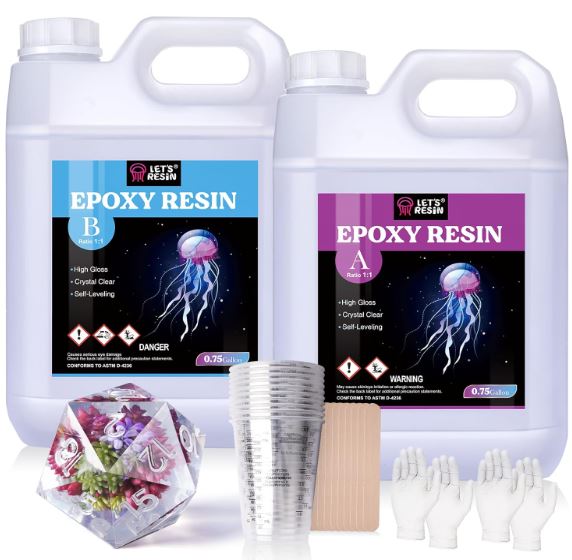
Materials Needed
- Epoxy resin
- Silicone egg molds
- Mixing & measuring cups
- Stir sticks
- Protective nitrile gloves
- Respirator mask
- Colorants, glitters, glow in the dark powders
- Small items to embed like polymer clay slices or fireglass
Step 1: Prepare Your Workspace
Set up your workspace in a well ventilated area. Cover your table with a disposable cover to protect it from spills. Make sure all your materials are within reach.
Step 2: Measure and Mix Resin
Put on your protective gloves and respirator mask. Measure equal parts of resin and hardener according to the instructions on the package. The best resin for this type of craft is to use a casting resin. Pour them into a mixing cup and stir slowly for about 2-3 minutes until thoroughly combined. Sometimes you might want to get rid of any bubbles, but this is up to you. The best way to do this is to use a bubble remover machine.
Step 3: Add Colorants and Additives (Optional)
If you want to add color or glitter to your resin, now is the time. Pour a small amount of mixed resin into separate cups and mix in your colorants or glitter. Or you can pour the clear resin into the egg and then add your inclusions. That’s the fun part, playing with different ways to make cool designs.
Step 4: Pour Resin into Molds
Slowly pour the mixed resin into your silicone egg molds. If you’re using colorants, you can pour in layers or swirl the colors for different effects. Tap the molds gently to release any air bubbles.
Step 5: Add Embedded Items (Optional)
If you want to embed small items like flowers, glitter, or trinkets, place them into the resin-filled molds. Use a long silicone stir stick to position them where you want. Just be careful not to introduce bubbles into the mold. Again, you can use a bubble remover machine or even a resin pressure pot if you are doing this for a living.
Step 6: Cure the Resin
Let the resin cure according to the manufacturer’s instructions. This usually takes 24-48 hours. Place the molds in a dust free area where they won’t be disturbed.
Step 7: Demold the Resin Eggs
Once the resin is fully cured, carefully remove the eggs from the silicone molds. If the eggs are still slightly flexible, let them cure for a bit longer. Be careful not to rip the mold. I have an article about how to demold resin.
Step 8: Sand and Finish (Optional)
If needed, sand any rough edges on your resin eggs using fine-grit sandpaper. You can also polish the resin for a smoother finish.
Step 9: Display or Sell Your Resin Eggs
Your resin eggs are now ready! Display them proudly or package them nicely for selling. Enjoy sharing your beautiful creations with others. See this guide on how to start a resin business if you want to know more about starting a resin business.
Thank you for reading! We hope these resin egg ideas have sparked your creativity and inspired your next crafting project. Remember, the possibilities with resin are endless, so don’t be afraid to experiment and add your personal touch to each piece. Happy creating and best of luck with your resin adventures!
Read up on more resin tips in these helpful guides: Resin tips for beginners there are a ton of helpful articles for you there including common resin problems and fixes.