How to SAND EPOXY RESIN: Pro Guide For 2025
Welcome to our guide on how to sand epoxy resin like a pro! Epoxy resin has gained immense popularity in the world of DIY crafts, woodworking, and art for its versatility and stunning finish.
So you might be wonder, can you sand epoxy resin?
The answer is yes. To achieve a flawless, glossy surface, you might find yourself needing to sand it down. Sanded resin will give you a crystal clear finish, free of imperfections if done correctly.
This blog post will provide you with the knowledge and techniques on how to sand resin without scratching, making your projects look their absolute best.
Once you are finished reading this article, head on over to our best tips on using epoxy resin.
From understanding the basics to mastering the art of epoxy resin sanding, we’re with you every step of the way. By the end of this article, you will know how to sand resin properly.
So, let’s dive in and discover the secrets to achieving a polished masterpiece with epoxy resin! From the type of sanding methods, to the reasons why you would need sanding.
How To Sand Epoxy Resin
1. Why Resin Would Need Sanding
Smooth Out Imperfections
Sometimes, when you’re pouring resin into a mold or coating a surface, tiny air bubbles or dust particles can sneak in, leaving you with a less-than-perfect finish.
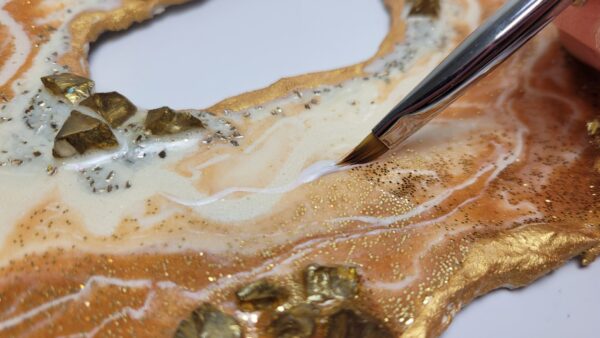
Sanding epoxy resin helps smooth out air bubbles in resin, creating a sleek and glossy surface that makes your project look like a pro did it. Having a smooth surface will also help you paint the resin if needed.
Remove Excess Resin
Resin has a mind of its own and can sometimes be a little overenthusiastic, causing drips, uneven layers, or excess buildup in your project. Sanding allows you to gently trim away the excess, making your resin work look neat and polished.
Fix Uneven Surfaces
If you’ve poured resin over an uneven or bumpy surface, sanding comes to the rescue. It helps you level out the highs and lows, ensuring that your final piece is flat and even. No more wobbles or uneven tabletops. Sanding resin is one of the ways you can fix pits in resin.
Prep for Additional Layers
Adding more layers or additional materials to your resin creation? Sanding is essential to create a good bonding surface. It roughs up the existing resin layer, giving the new layer something to grip onto, ensuring a secure attachment.
Achieve a Matte or Satin Finish
Sometimes that ultra-glossy look isn’t what you’re going for. Sanding can be your ticket to a matte or satin finish. By scuffing up the surface, you tone down the shine, providing a more subdued and elegant appearance.
Remove Scratches and Blemishes
After your resin project has cured and you’ve encountered accidental scratches, nicks, or imperfections, sanding is your go-to solution. With the right sandpaper and a gentle touch, you can eliminate these flaws and restore the flawless beauty of your creation.
Create a Frosted Effect
If you’re aiming for a frosted or translucent effect in your resin art, sanding is your secret weapon. By sanding the surface, you can achieve a semi-opaque or frosted appearance, which adds a touch of mystery and intrigue to your work.

Customize the Texture
Sanding offers the opportunity to customize the texture of your resin projects. Whether you want a smooth, glass-like finish or a textured, tactile experience, you can achieve it through various sanding techniques and grits. This enables you to tailor your creations to match your unique artistic vision.
2. Basic Sanding Instructions For Resin
Start with the Right Grit
Are you wondering what grit of sandpaper to use for resin? Begin sanding with a coarser grit sandpaper and gradually progress to finer grits. Coarser grits remove more material, while finer grits create a smoother finish. This step-by-step approach helps you achieve the desired level of smoothness.
Prevent Buildup On Sandpaper
Regularly clean your sandpaper to prevent resin buildup, which can lead to inefficient sanding and overheating. To clean and maintain sandpaper during resin sanding, use a wire brush or an old toothbrush to gently remove resin buildup and debris from the sandpaper’s surface.
This helps prolong the life of the sandpaper and ensures more effective sanding. If the sandpaper is heavily clogged or worn, consider replacing it for optimal results.
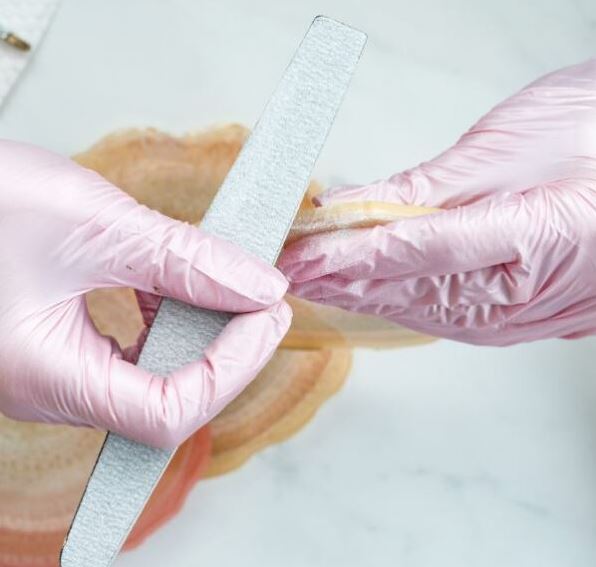
Use Even Pressure
This is how to sand epoxy resin by hand. Apply even pressure while sanding to avoid creating uneven spots on your resin surface. Keep the sandpaper flat against the workpiece to maintain a consistent finish.
Check Progress Frequently
Periodically stop and inspect your work to gauge the progress. Look for areas that need more attention and ensure you’re achieving the desired level of smoothness.
Watch for Overheating
Be cautious about overheating the resin, as excessive heat can lead to melting or surface damage. Use light to moderate pressure and allow the sander to do the work. If the resin becomes hot to the touch, take a break and let it cool down.
Change Sandpaper When Necessary
Replace the sandpaper when it becomes worn or clogged with resin and dust. Fresh sandpaper ensures efficient and effective sanding.
Work Through Grits Gradually
Progress through the grits systematically, starting with a coarser grit and moving to finer grits. This gradual transition helps smooth out the surface and minimize visible scratches from coarser sanding.
Clean Up Properly
After sanding, thoroughly clean your workspace to remove resin dust and debris. A dust collection system or vacuum can be useful in this regard.
Final Polishing
If a high-gloss finish is desired, consider using micro-mesh sanding pads and a polishing compound to achieve a mirror-like shine. These final steps can greatly enhance the appearance of your resin project. We have a complete guide on how to polish resin.
3. The Main Types Of Resin Sanding
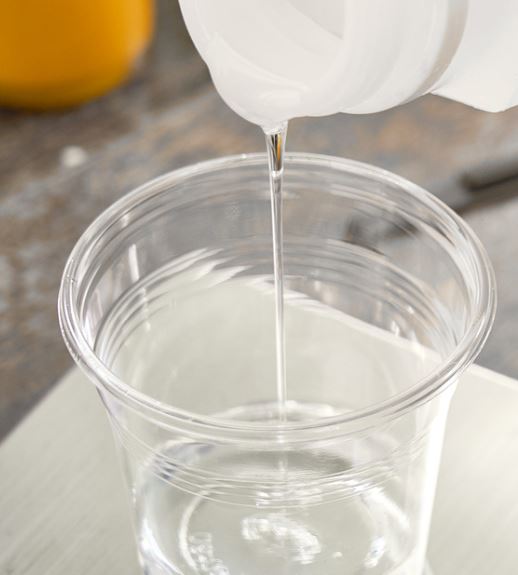
Wet Sanding
Wet sanding involves using water as a lubricant while sanding the resin. It helps prevent the resin from overheating and melting, which can be a concern when dry sanding.
The water not only cools the surface but also clears away debris, allowing for smoother and more controlled sanding.
This method is particularly useful for achieving a polished finish on epoxy resin projects, but it does require more caution to avoid introducing moisture into the resin itself.
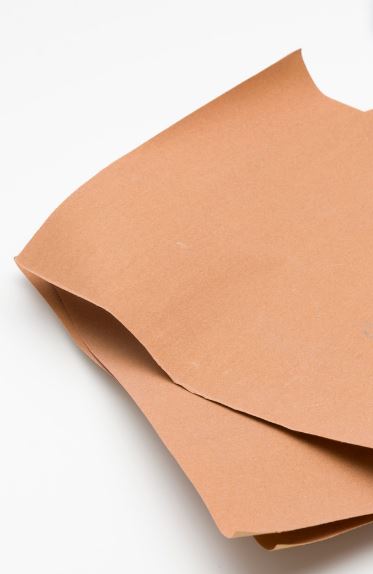
Dry Sanding
Dry sanding is the conventional method of sanding resin without the use of water or any other liquid. It’s suitable for initial shaping or rough sanding, but it can generate a fair amount of heat due to friction.
Therefore, it’s important to be cautious to avoid overheating the resin, which can lead to melting or surface damage. Dry sanding is often used for leveling and removing imperfections in the resin.
Micro-Mesh Sanding
Micro-Mesh sanding involves using a specialized set of abrasive pads known as Micro-Mesh pads. These pads have a very fine grit and are designed to be gentle on the resin surface, making it ideal for achieving a high-gloss finish.
Micro-Mesh sanding gradually refines the resin to a polished state without causing overheating or aggressive removal of material. It’s often the preferred method for fine finishing and achieving a smooth, lustrous appearance on resin projects.
Buffing and Polishing
Buffing and polishing are the final steps after sanding to achieve a glossy, mirror-like finish on resin.
This technique involves using polishing compounds and buffing wheels or pads to bring out the shine in the resin.
It’s a step for making your resin creations truly shine and is especially popular for jewelry and tabletop projects.
Each of these sanding techniques serves a specific purpose in the realm of resin crafting, allowing artisans to achieve a range of finishes and textures to suit their creative visions. The choice of method often depends on the desired outcome and the level of precision required for a particular project.
4. grits of sandpaper & Sequence For Resin
Coarse Grits (60-100)
Coarse grits are used for initial sanding to remove imperfections, level the surface, or reshape the resin. These grits are effective at quickly removing material but leave visible scratches.
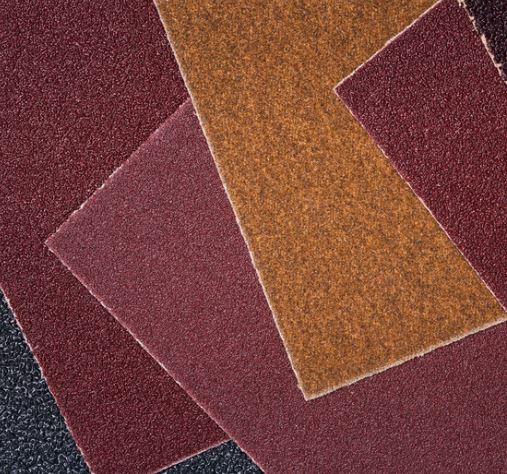
Medium Grits (120-220)
Medium grits are the next step in the sequence and help smooth the surface and refine it after coarse grits. They begin to reduce the visible scratches and prepare the surface for finer sanding.
Fine Grits (320-400)
Fine grits are used to achieve a smoother surface, eliminating the visible scratches left by coarser grits. They prepare the resin for finishing or polishing and provide a good balance between material removal and surface refinement.
Very Fine Grits (600-1000+)
Very fine grits are used for finishing and polishing resin. They create a smooth surface and minimize visible scratches. These grits are ideal for achieving a high-gloss finish on your resin project.
The specific sequence you follow may vary based on the condition of your resin surface and the level of smoothness or shine you wish to achieve.
Start with a coarser grit to address imperfections or reshape the resin and progress to finer grits for smoothing and finishing. Remember to transition between grits gradually to achieve the best results.
5. Types of Sanders For Epoxy Resin
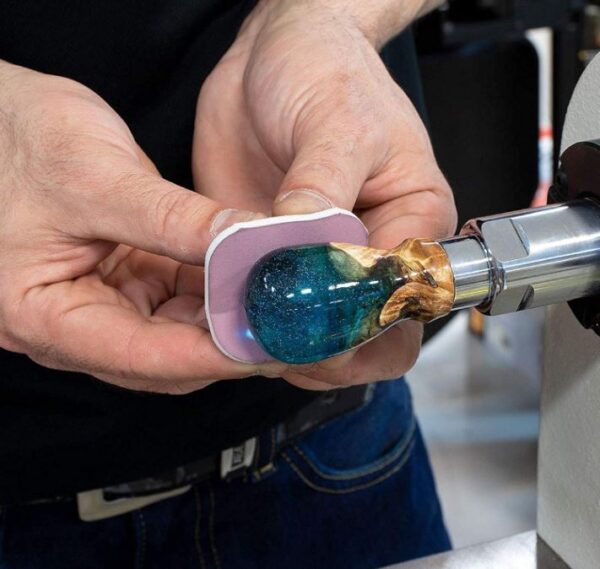
Hand Sanding
Hand sanding with sandpaper is a versatile method suitable for a wide range of resin projects. It’s commonly used for smaller items like resin jewelry, coasters, and figurines, allowing for intricate detailing and achieving a smooth finish. As you move down in grits, it will make the resin smooth.
Orbital Sander
Orbital sanders are great for larger resin projects such as tabletops, countertops, and resin art pieces. They provide efficient sanding for broader surfaces while preventing swirl marks and ensuring a consistent finish.

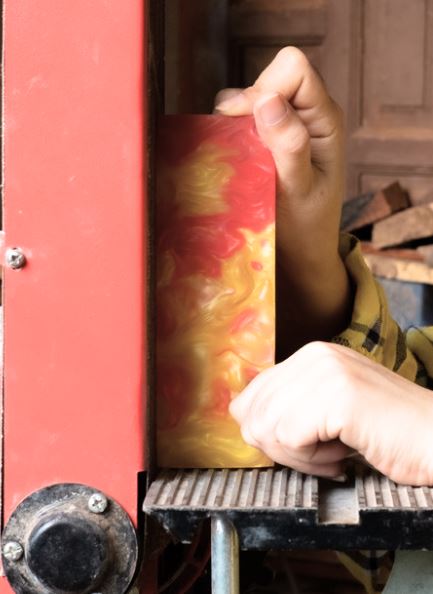
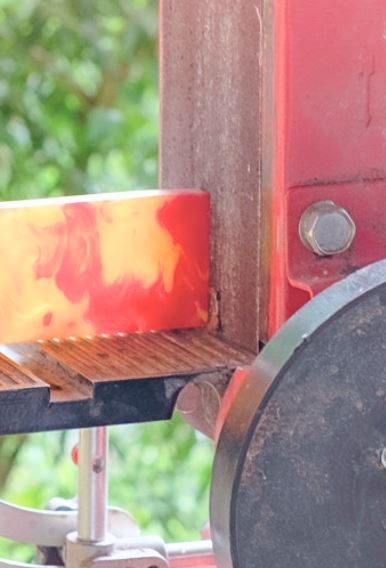
Belt Sander
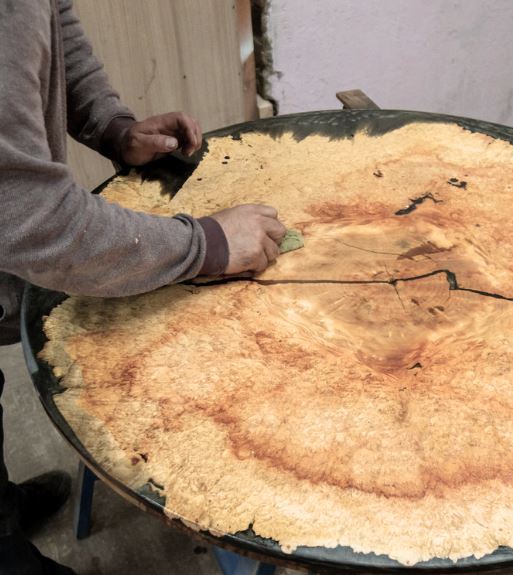
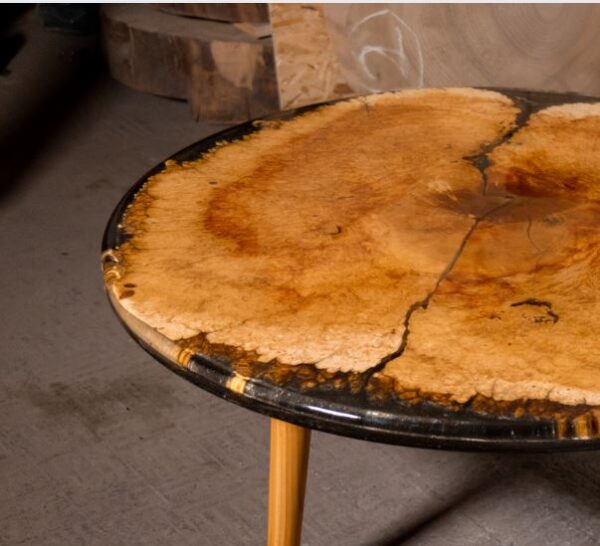
Belt sanders are powerhouses for removing material and leveling resin surfaces. They’re often employed for substantial projects like large tabletops, countertops, or resin river tables to achieve even and flat surfaces.
Disc Sander
Disc sanders, in both stationary machines and handheld tools, are perfect for precision work. They are commonly used to maintain flat and even surfaces on resin sculptures, art panels, and larger decor items.
Spindle Sander
Spindle sanders are designed for curved and contoured surfaces, making them a go-to tool for shaping and smoothing intricate resin pieces like carvings, bowls, and decorative trim.

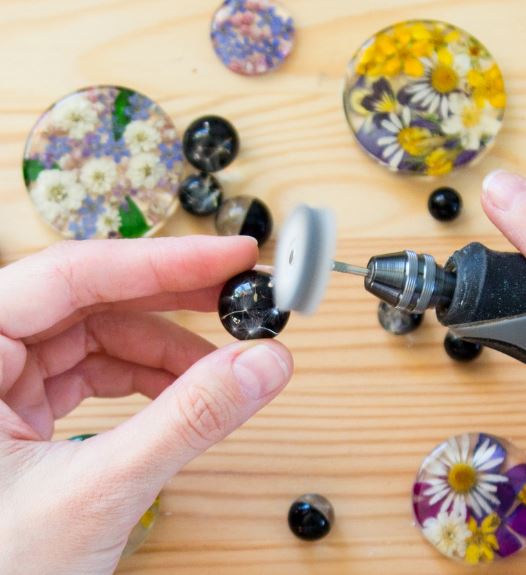
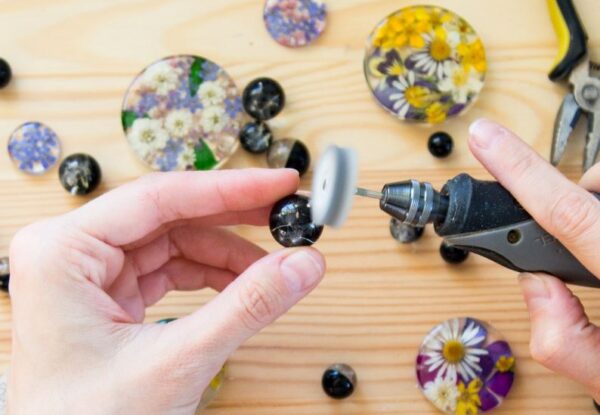
Mini Rotary Tools (Dremel)
Mini rotary tools, like Dremels, are excellent for intricate detailing and fine sanding on resin jewelry, miniature figurines, and any project where precision is key. They can access tight spaces and small areas with ease.
Benchtop Drum Sander
Benchtop drum sanders are ideal for creating consistent thickness in resin slabs and sheets used in various applications like tabletops, inlay work, or large-scale resin art pieces.
Each of these sanders complements different types of resin projects, catering to various shapes, sizes, and levels of precision. Whether you’re working on small jewelry items or large furniture pieces, choosing the right sander can significantly enhance the quality and efficiency of your resin crafting endeavors.
6. Keeping The Sandpaper Clean
When sandpaper accumulates resin due to friction, it’s essential to clean it regularly to maintain effective sanding. To do so, you can use a wire brush or an old toothbrush to gently remove the clogged resin particles from the sandpaper’s surface.
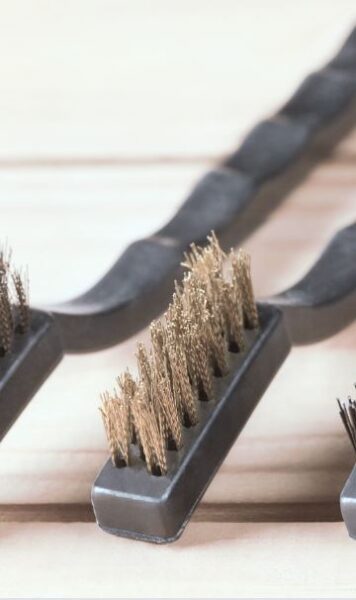
If the resin buildup is substantial, you may need to replace the sandpaper altogether for optimal results. Keeping your sandpaper clean ensures that it maintains its abrasive qualities and continues to smooth the resin surface without excessive heat or wear, allowing you to achieve the desired finish in your resin project.
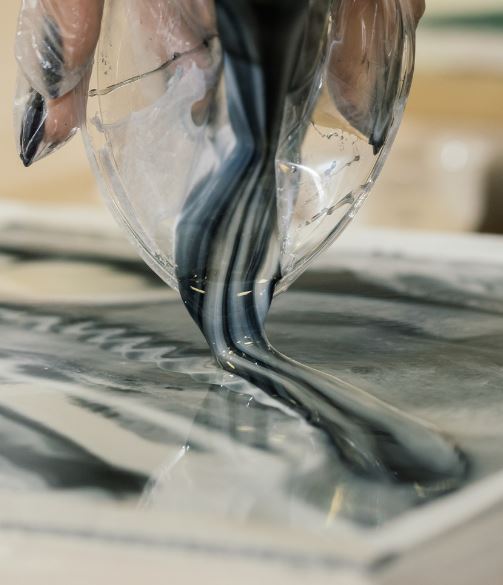
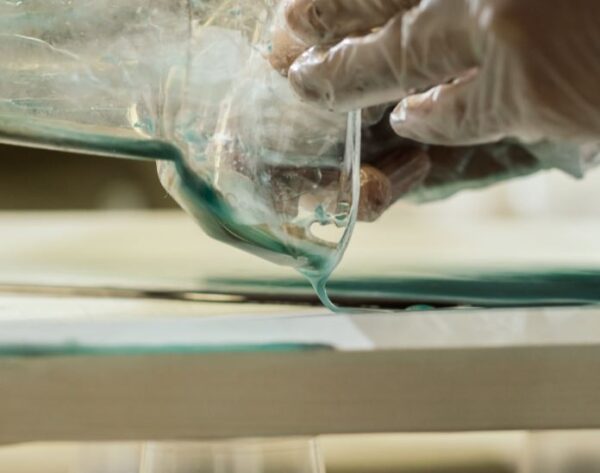
7. Recoating With A New Layer Of Resin
Recoating with a new layer of resin is a valuable technique in resin crafting, often used to refresh the appearance of your projects and add depth and luster. This process involves applying a fresh layer of epoxy resin on top of an existing resin surface that has already cured.
Before recoating, it’s crucial to thoroughly clean and lightly sand the cured resin to ensure good adhesion. The new layer bonds with the old layer, creating a seamless finish that can hide imperfections and enhance the overall look of your piece.
Whether you’re refinishing a tabletop, fixing minor blemishes, or giving your artwork a glossy sheen, recoating with resin can be a transformative step in your creative process, allowing you to achieve a professional and flawless final result.
8. Resin Sanding Safety Precautions
Wear Protective Gear
Before you start sanding, make sure to wear appropriate safety gear. This includes safety glasses or goggles to protect your eyes from flying particles, a dust mask or respirator to shield your lungs from resin dust, and nitrile gloves to keep your skin safe from resin particles and sanding debris. Check out how to work with resin safely with our helpful guide.
Always follow safety precautions when working with resin from smaller crafting creations like jewelry to large jobs like tables and countertops.

Work in a Well-Ventilated Area
Always sand resin in a well-ventilated space, preferably with a good airflow. This helps to disperse any resin dust or fumes and reduces the risk of inhaling harmful particles. If you’re working indoors, consider using an exhaust fan or opening windows and doors.
Use a Dust Collection System
Employ a dust collection system or a vacuum with a HEPA filter to capture resin dust at its source. This not only keeps your workspace cleaner but also minimizes the inhalation of potentially harmful particles.
Avoid Heat Buildup
Be mindful of heat buildup when sanding resin. Excessive heat can melt the resin or pose a fire hazard. Use light pressure, allow the sander to do the work, and periodically check for resin buildup on the sandpaper to prevent overheating.
Prevent Contact with Skin
Wear appropriate clothing and use nitrile gloves to avoid direct skin contact with resin and sanding residue. This helps protect your hands and minimizes the risk of skin irritation or allergies.

Work with Adequate Lighting
Good lighting is essential for precision and safety. Ensure you have sufficient illumination in your workspace to see what you’re doing clearly, reducing the risk of accidents or injuries.
Dispose of Waste Safely
Properly dispose of sanding debris, used sandpaper, and any materials contaminated with resin in accordance with local regulations. Avoid flushing resin particles down the sink or disposing of them in a way that could harm the environment.
Store Resin Materials Safely
Store epoxy resin and associated materials in a cool, dry place, away from direct sunlight and open flames. Follow manufacturer guidelines for storage to prevent accidental spills or hazards.
Maintain First Aid Supplies
Have a basic first aid kit on hand in case of minor injuries, such as cuts or splinters. It’s always best to be prepared for unexpected accidents.

Read Product Labels and Instructions
Always read and follow the instructions provided by the manufacturer of the resin and any sanding tools you’re using. Familiarize yourself with the specific hazards and safety precautions related to the products you’re working with.
By following these safety tips, you can enjoy your resin crafting projects with confidence, knowing that you’re taking the necessary precautions to protect yourself and your workspace.


Resin sanding FAQ’s: Here are some of the most common questions and solutions when sanding resin
1. Is Epoxy Resin Hard To sand?
Epoxy resin can be somewhat challenging to sand, primarily due to its inherent hardness and durability. Once it cures, epoxy resin forms a tough, glossy surface that can resist abrasion and impacts.
Sanding epoxy resin requires the use of sandpaper with specific grits and a fair amount of patience. While it may be hard, it’s not impossible to sand epoxy resin effectively.

The key is to approach the task with the right tools and techniques, gradually working your way through the grits of sandpaper to achieve the desired smoothness or texture which we will discuss in more detail below.
So, while it may pose some initial resistance, with practice and the right approach, you can indeed achieve fantastic results when sanding epoxy resin. We will go over the right tools to choose for the job next.
2. Can you sand resin that is sticky To Fix it?
Sanding sticky resin to make it hard is not a recommended solution. When resin remains sticky or tacky after it’s supposed to cure, it typically indicates that the curing process was not completed correctly or that the resin was improperly mixed.
It’s essential to wait until the resin is fully cured before sanding. Attempting to sand uncured or partially cured resin can lead to gumming up the sandpaper, creating a messy surface, or damaging the piece.
Ensure the resin has reached its recommended curing time or hardness before beginning the sanding process for the best results. Sanding sticky resin is unlikely to resolve the issue. Instead, consider the following steps:
Identify the Cause
Determine why the resin remains sticky. It could be due to inaccurate mixing ratios, insufficient curing time, or other factors like temperature or humidity. Adding too much colorants can effect resin curing times.
Scrape off Sticky Resin
If the resin is partially cured but still tacky, you may be able to scrape off the sticky layer with a plastic scraper or craft knife. Be sure to wear gloves and work in a well-ventilated area. This is not an ideal solution though and may not work depending on the level of curing.
Proper Mixing
For future resin projects, ensure you follow the manufacturer’s instructions for accurate mixing ratios and thoroughly mix the components. Properly mixed resin should cure correctly.
Curing Conditions
Pay attention to the environmental conditions during curing, including temperature and humidity. Some resins may require specific conditions for successful curing.
Consult the Manufacturer
If you continue to have issues with sticky resin, contact the manufacturer for guidance and potentially explore solutions they may suggest.
In summary, sanding sticky resin won’t make it hard; it’s essential to address the root cause of the stickiness to ensure a successful resin curing process.
3. Why is my sanded resin still cloudy or hazy?
Cloudiness or haziness after sanding resin can occur due to several factors. It may be a result of using lower grit sandpaper, which leaves visible scratches.
To achieve clarity, start with coarser grits and progress to finer grits for a smoother finish. After sanding, consider a polishing step with micro-mesh pads or a suitable resin polish to restore the resin’s clarity and shine.
4. How can I fix visible scratches or scuffs on my resin piece after sanding?
To repair visible scratches or scuffs on your resin piece, start with a finer grit sandpaper (e.g., 400-600 grit) and sand the affected area gently. Gradually progress to even finer grits to remove the scratches.
Afterward, use a polishing compound and micro-mesh pads to restore the shine. This step can significantly diminish or eliminate the blemishes.

5. What should I do if I accidentally over-sanded my resin project?
If you’ve over-sanded your resin project and removed too much material, consider patching the affected area. Apply a thin layer of fresh resin and level it with the surrounding surface.
Once cured, sand it carefully and gradually to achieve a uniform finish. Make sure to match the resin type and color for the best results.

6. Can I wet sand resin, and how does it differ from dry sanding?
Yes, you can wet sand resin. Wet sanding involves using water as a lubricant to cool the surface and prevent resin from overheating. It also helps clear away debris and keeps the sandpaper clean
7. Can I sand Off Resin That Is Yellowing?
No, sanding resin that is yellowing is not an effective method to address the issue. Yellowing typically occurs due to environmental factors or the resin’s aging process.
Instead, consider applying a fresh layer of clear resin to the surface or using specific resin products designed to counteract yellowing. Sanding may remove the yellowed layer, but it won’t prevent the issue from recurring in the future.
We have a helpful article you will want to read up on, it’s all about yellowing resin and how to avoid it.
8. Can I use power tools like a rotary tool (Dremel) for detailed resin sanding?
Yes, power tools like a rotary tool (e.g., Dremel) equipped with sanding attachments can be used for detailed resin sanding. They are excellent for intricate work and reaching tight spaces.
However, be cautious when using power tools to avoid removing too much material too quickly. Always practice on a sample piece before working on your main project. Another option to use for smaller pieces like pendants, geode resin art and crafting items is to use a nail drill.
We recommend this one below as it comes with several different drill bits and you can set it at a very slow rotation if needed. It also comes with a cure lamp for UV resin as well as a dust machine to collect dust particles when sanding, it’s super handy kit to have on hand.

In closing: Thank you for joining us on this epoxy resin sanding journey. We hope this guide has provided you with the insights and confidence needed to tackle your epoxy resin projects with finesse.
Remember, mastering the art of sanding epoxy resin takes practice, so don’t be discouraged if your first attempts aren’t perfect – perfection comes with time and experience.
If you found this blog post helpful, please share it with fellow enthusiasts and DIY enthusiasts. Your support helps us continue creating valuable content for the community.
For more tips, tricks, and inspiration on epoxy resin and various other crafting and woodworking endeavors like making resin wood art, stay tuned for our future blog posts.
We’re here to help you unleash your creativity and achieve stunning results in your projects. Thanks for reading, and happy crafting!