How To Make Resin Jewelry
Welcome to a helpful guide on how to make resin jewelry. If you’ve ever wondered how to make resin jewelry, you’re in the right place.
Resin jewelry is a fun and creative craft that’s perfect for beginners. You can make everything from earrings and rings to keychains and pendants.
I’ll walk you through the basics of how to make resin jewelry, step by step. It’s easier than it looks—and super addictive once you get started!

When I first got into resin, the very first thing I made was a couple of pendants. I had no clue what I was doing, but I was hooked right away.
Watching the resin go from a liquid to a shiny little gem felt like magic. Sure, they weren’t perfect, but I was proud of them and I’ve been obsessed ever since. You can use these ideas for your own resin jewelry, to sell or even start your own resin jewelry business.
How to Make Resin Jewelry for beginners
1. Getting Started with resin jewelry
Resin is awesome for beginners because it’s super easy to use. You don’t need fancy tools or a big setup, just some resin, molds, and a few extras like glitter or flowers.

Plus, resin jewelry looks amazing, even if you’re just starting out. It gives you that shiny, glassy look without all the hard work.
2. Choosing the right resin for your jewelry
Selecting the proper epoxy resin for jewelry making is a decision that influences the outcome of your jewelry projects.
The first step in making jewelry with resin is to understand the types of resin available and the unique characteristics each one has.
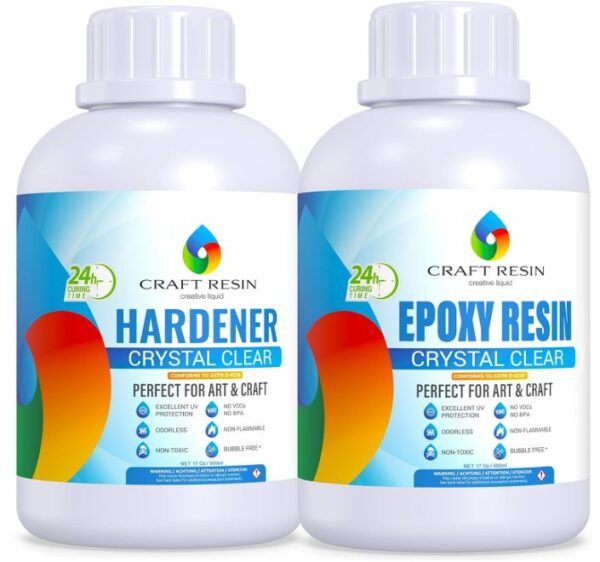
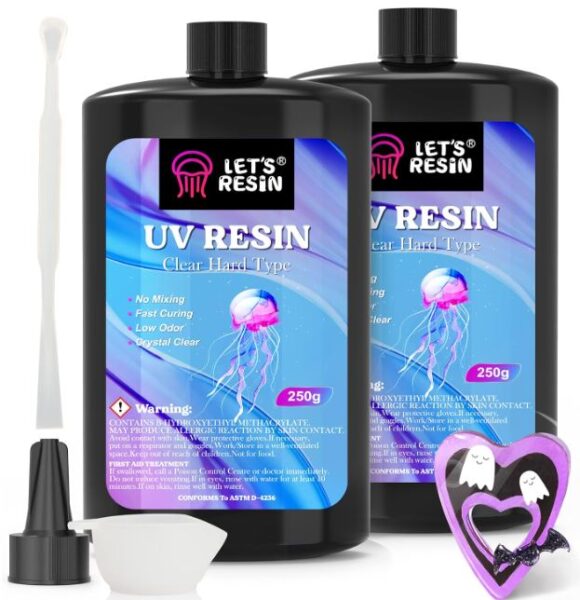
Epoxy resin and UV resin are the two main ones that I use, each with their own advantages.
Epoxy resin is known for its durability, making it an excellent choice for a wide range of jewelry creations like pendants and chunky jewelry.
It give you a glossy, glass-like finish and is great for embedding objects and creating intricate designs.
On the other hand, UV resin is a quick-curing type of resin that’s perfect for small, delicate projects like tiny food jewelry and earrings.
It cures fast when exposed to UV light, so it’s super easy to use. You can complete your pieces in no time. See this Domino Resin Pendant Tutorial to learn how to use this type of resin step by step.
Once you’ve decided on the type of resin that best suits your project, then you can learn about other factors when choosing the right resin. Viscosity, or the thickness of the resin, is something to know about.
Thicker resins are for embedding larger objects, while thinner resins work better for coating and sealing.
Factor in the pot time, which is the working time you have before the resin begins to harden.
Another thing to consider is the clarity of the resin. Some resins may have a slight yellowing or may not be entirely crystal clear.
Clarity is important, especially when working with translucent or transparent elements in your jewelry, as it affects the final appearance of your pieces. Check out this guide on how to use resin properly before starting out.

Quick Tips For Choosing Resin For Jewelry
- Purchase resin that has a reputation of being crystal clear
- Use UV resin for smaller jewelry pieces as it will cure when it’s placed under a UV light
- Choose epoxy resin that doesn’t create a lot of bubbles when stirring
- Thicker resins will hold embedded objects better
- Look for resin that is formulated to be yellow resistant. ArtResin epoxy is a brand that has stabilizers that helps slow down yellowing.
By choosing a clear resin, you can get the look you envision for your epoxy resin jewelry, whether it’s a clear, pristine finish or a slightly tinted, vintage effect.
3. How to use resin for jewelry
Gather Your Supplies
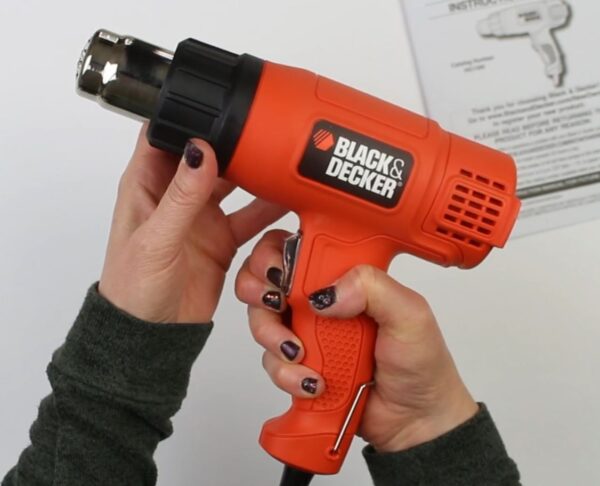
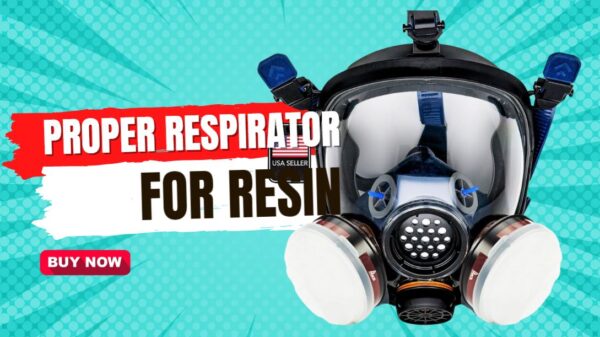
Collect your materials, including epoxy or UV resin, molds, inclusions (such as dried flowers or glitter), pigment or dyes (if desired), mixing cups, stirring sticks, a heat gun or torch, and personal protective equipment (a proper resin respirator, nitrile gloves and a well-ventilated workspace).
Prepare Your Workspace
Set up a clean, organized, and well-ventilated workspace with a flat surface. Cover your work area with a disposable tablecloth or plastic sheet to catch any drips or spills.
Measure and Mix the Resin
Follow the manufacturer’s instructions to measure and mix the resin and hardener components in the designated mixing cups. Typically, this involves using a 1:1 ratio by volume or weight.
If you are starting out with UV resin, there is no mixing.
Add Pigments or Dyes (Optional)
If you want to color your resin, add pigment, thermochromic colorant powders or dye in small amounts. Mix well until you get to your desired color.
Pour Resin into Molds
Carefully pour the mixed resin into your chosen molds. Fill the molds to the desired depth, taking care not to overfill. It’s best to use a silicone mold so that the resin does not stick to it. Here’s a list of other surfaces that resin doesn’t stick to.
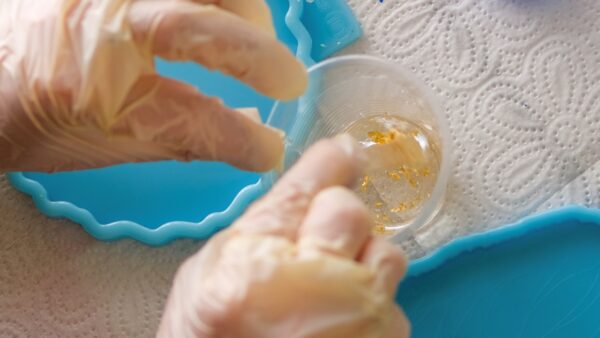
Add Inclusions
If you’re embedding objects or inclusions, use tweezers or a toothpick to arrange them within the resin. Adjust their position until you’re satisfied with the design.
Also, if you are using paper as part of your resin jewelry, you will need to seal it first to prevent the inks from running. See this complete guide on how to seal paper for epoxy resin.
Remove Air Bubbles
Again, use a heat gun or torch to pass over the resin’s surface to release any remaining air bubbles. Be gentle and maintain a safe distance to avoid overheating the resin.
Curing Time
Allow the resin to cure as per the manufacturer’s recommendations. This usually involves letting it sit undisturbed for several hours or overnight if using epoxy resin.
When using UV resin, it will be cured within a few minutes.
Demold and Finish
Once the resin is fully cured and hardened, gently demold your jewelry pieces. You may need to flex silicone molds to release the items.
After demolding, you can sand, polish, and finish your jewelry to get the desired shine and clarity.
To learn more about finishing with sanding check out this guide about sanding epoxy resin.

With these basic steps and some practice, you can create beautiful resin jewelry pieces. Remember to follow safety guidelines, be patient, and experiment with different designs and techniques to develop your skills and style.
4. Supplies for resin jewelry
Creating resin jewelry is a fun craft and you need the right tools and supplies. Here are some of the supplies I have on hand to make resin jewelry.
Resin
Resin is the core material for your jewelry. Depending on your project, you can choose between epoxy resin and UV resin, each with its own curing process and characteristics.
Safety Supplies
Safety Gear & resin safety should be your top priority when working with resin. Always wear gloves, a well-ventilated mask, and protective eyewear to avoid skin contact and inhaling fumes.
Jewelry Making Supplies
Jewelry Molds come in many shapes and sizes and are what you will use for creating specific designs. Silicone molds are popular due to their flexibility and ease of release.
Inclusions & Embeds
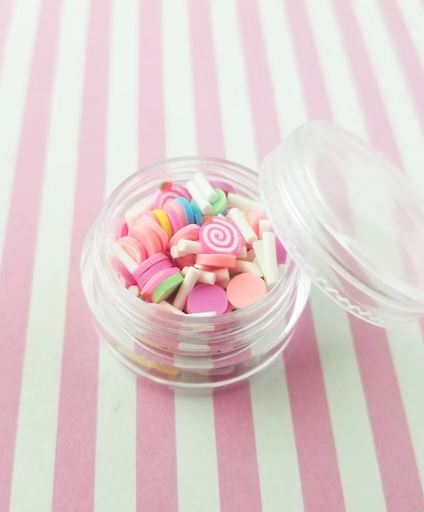
Collect and prepare the inclusions for your jewelry, which can include dried flowers, tiny charms, glitter, or other decorative elements like polymer clay embeds.
Measuring Tools
Silicone measuring cups and stir sticks are the best so that you can reuse them.
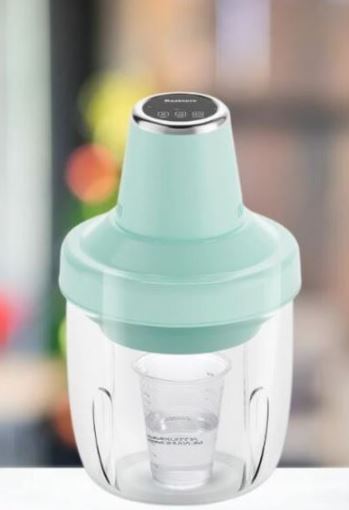
Mixing Containers
You’ll need containers for measuring and mixing the resin. The best mixing containers are silicone as they can be reused many times to reduce waste and money.
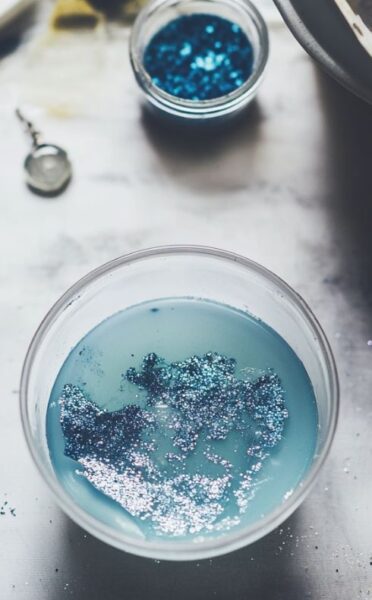
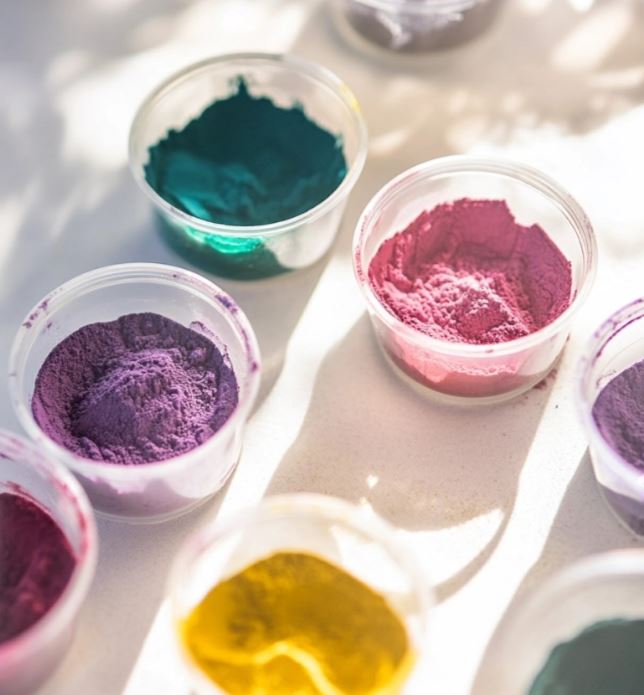
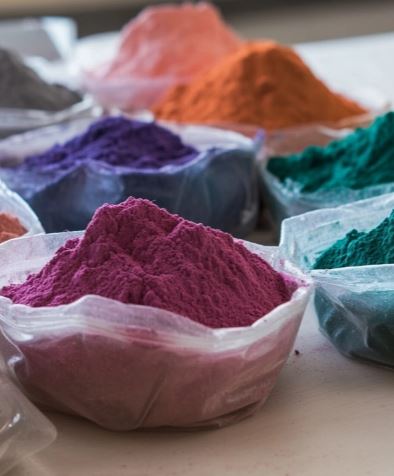
Pigments and Dyes
If you want to add color to your resin, various pigments, and dyes are available. These allow you to get vibrant, custom hues.
I cover more information about using pigments and dyes below to make multicolored resin jewelry. Also, see this guide about the best colorants for resin to use.
Stirring Sticks
Silicone stir sticks are what is needed for thoroughly mixing the resin and any added pigments or dyes. Do not use wood because you can get little pieces of stuff in the resin. Silicone is really the best to use.
Air Bubble Removers
Use a Heat Gun or Torch to remove air bubbles for a smooth finish. A heat gun or torch helps to eliminate bubbles that form during the mixing process. You can also use a resin bubble remover machine.
Polishing Supplies
Once your resin pieces have cured, you’ll need sandpaper and polishing compounds to refine the surface if you have any bumps to get a high-gloss finish. See this guide on how to polish epoxy resin.
Having these jewelry making supplies on hand help so that you’re well-prepared to create proper resin jewelry pieces.
5. Safety precautions when working with resin
When working with resin, it’s essential to prioritize safety: work in a well-ventilated area and wear a respirator to avoid inhaling fumes, use gloves and safety goggles to protect your skin and eyes.
Have a dedicated workspace, avoid direct contact with resin on your skin, and handle chemicals with care.
Read and follow the manufacturer’s instructions for the specific resin you’re using for safe handling, proper disposal of waste, and compliance with safety guidelines. Also, I never suggest kids working with resin. I consider this an adult craft.
6. Adding color to resin jewelry
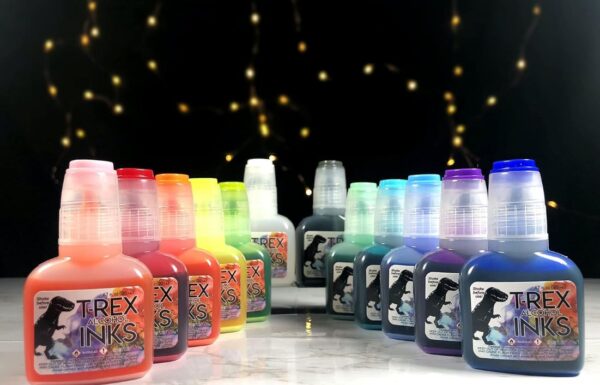
When it comes to adding color to your resin, you have several options, including dyes, pigments, and inks, each with its unique properties and techniques.
Dyes & Pastes
Resin dyes are highly concentrated, liquid colorants specifically designed for resin. They offer vibrant, transparent hues that are easy to mix and control. To use dyes effectively, add a few drops to your mixed resin and stir thoroughly.
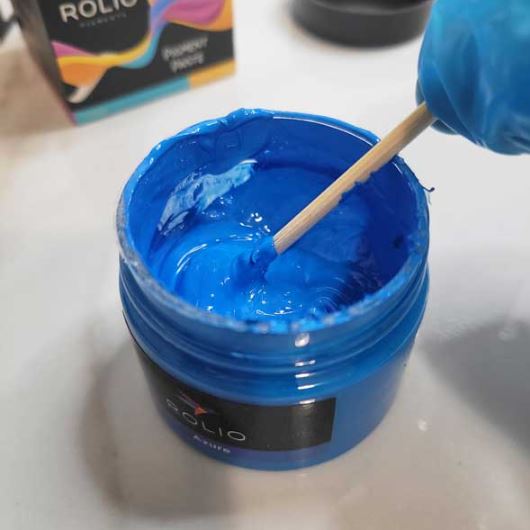
Dyes are good for a translucent, stained glass-like effects in your jewelry. They’re especially popular when you want to preserve the clarity and transparency of the resin while introducing color. Check out this helpful guide about the best colorants to use for resin.
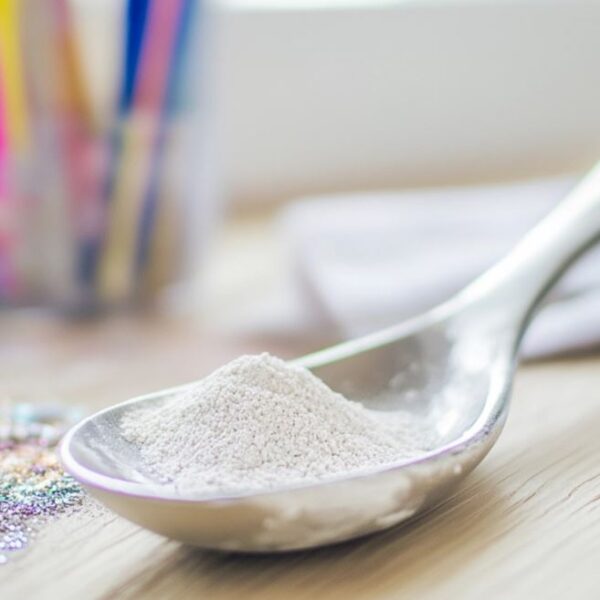
Pigments
Resin pigments come in liquid, powder & paste. Pigments have a broader range of color choices and work well when you’re aiming for opaque or solid-colored designs.
They are often used to create solid backgrounds or colored layers in resin jewelry. When using pigments, add them to your mixed resin slowly, as a little goes a long way.
The level of pigment you add will determine the intensity of the color.
Alcohol Inks for resin jewelry
Alcohol inks are a popular choice for adding intricate patterns and designs to resin jewelry. They are available in a variety of colors and are versatile for creating abstract or marbled effects.
Alcohol inks are best applied in small drops or streaks onto the surface of the resin, allowing them to spread and blend organically.
You can manipulate the inks with tools like toothpicks or straws to create unique patterns.
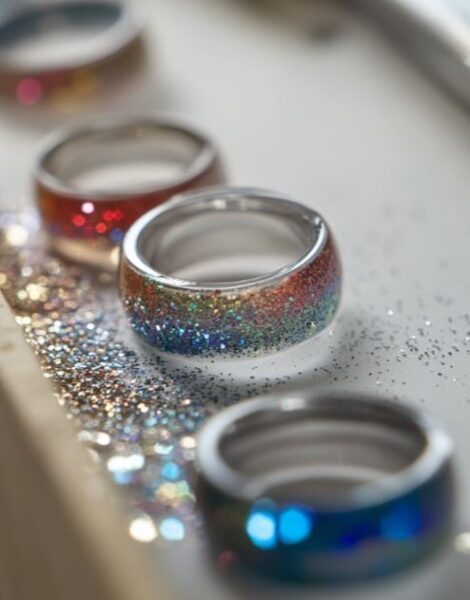
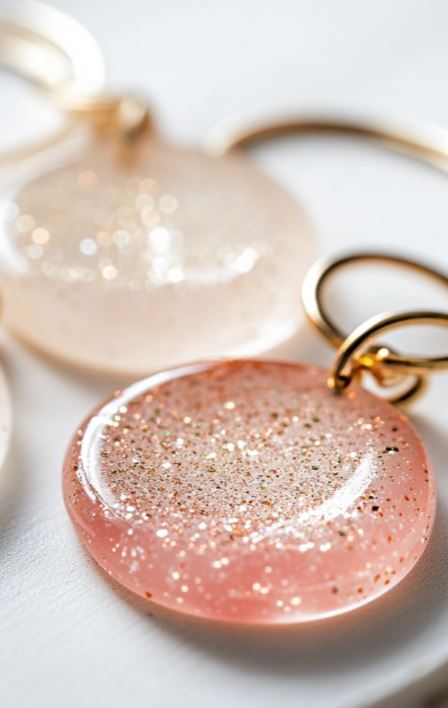
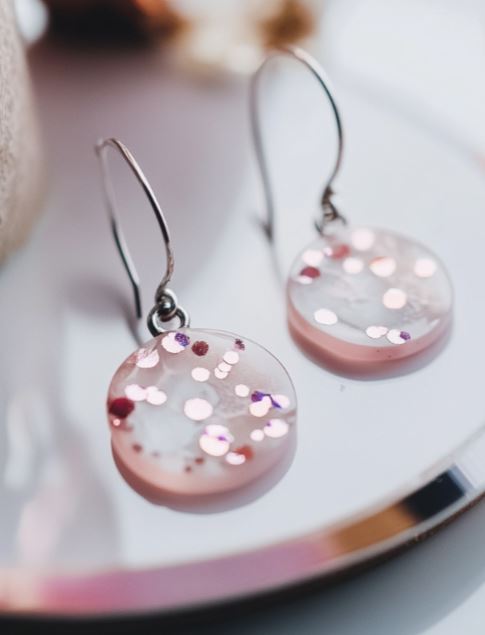
Glitter
Glitter is a highly popular choice for adding sparkle and visual interest to resin creations. Its reflective quality and ability to catch and refract light make it a fantastic for resin jewelry.
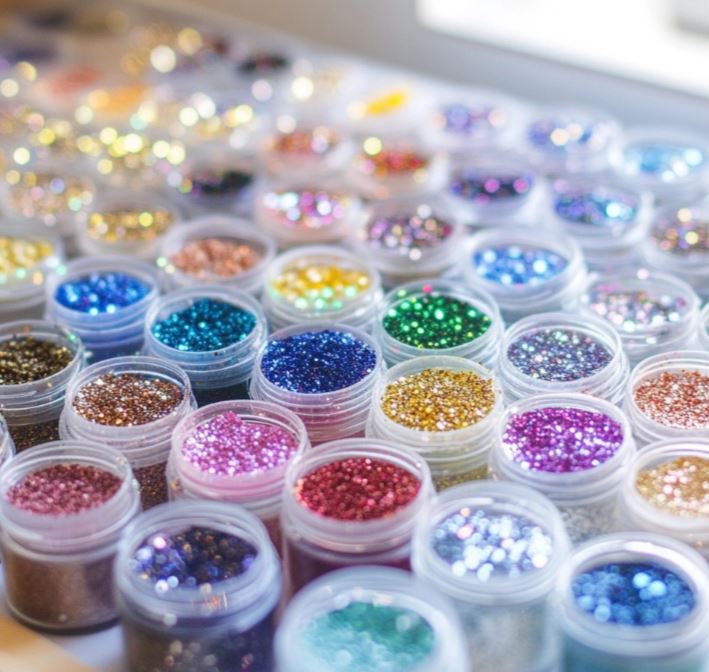
Practicing on small, disposable projects can help you refine your technique before working on your main resin jewelry pieces.
7. Working with molds
Molds are what you will need to shape and encapsulate your resin jewelry. Whether you’re a beginner or an experienced crafter, understanding how to work with molds is key to crafting unique shapes and designs in resin jewelry.
Mold Selection
The first step in working with molds is choosing the right one for your project. Silicone molds are popular for their flexibility, ease of use, and ability to produce intricate details.
They come in various shapes and sizes, including those designed specifically for jewelry components like pendants, beads, and bangles.
Mold Preparation
Sometimes you might have a really intricate mold. For this type of mold, use a mold release agent. To do this, apply a mold release agent or a thin layer of petroleum jelly to the mold’s interior surfaces. This minimizes the risk of the resin adhering to the mold and simplifies the demolding process.
Pouring Resin
When you’re ready to pour the resin, follow the manufacturer’s instructions carefully. Pour slowly and steadily to prevent air bubbles from forming.
Depending on your design, you may pour multiple layers of resin to create depth and dimension within the mold.
Adding Inclusions
If your design calls for embedded items such as flowers, beads, or charms, decide if you want to add them to the mold before the resin, or sprinkling them on top of the resin. It will depend on what you are using.
Fine glittery elements will sit more on top, and heavy embeds will settle near the bottom.
Demolding
After your resin has cured, carefully demold your jewelry pieces. Flex the silicone mold to release the resin. Be patient and gentle during this process to avoid any damage to the cured resin.
Finishing Touches
Once removed from the mold, your resin pieces may have sharp edges or imperfections. Use sandpaper and polishing compounds to smooth the edges.
Experimentation
Don’t be afraid to experiment with different mold shapes, sizes, and techniques. Create layered designs, incorporate multiple molds into one piece, or experiment with translucent and opaque layers.
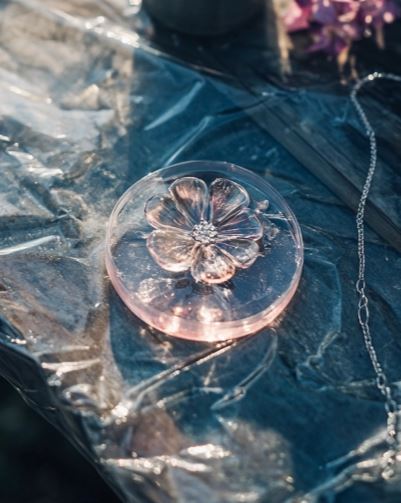
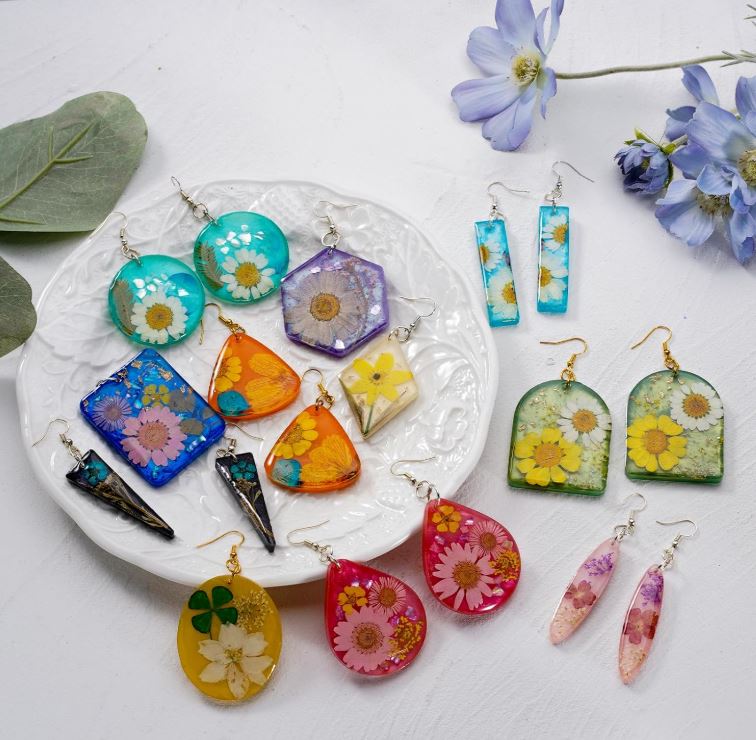
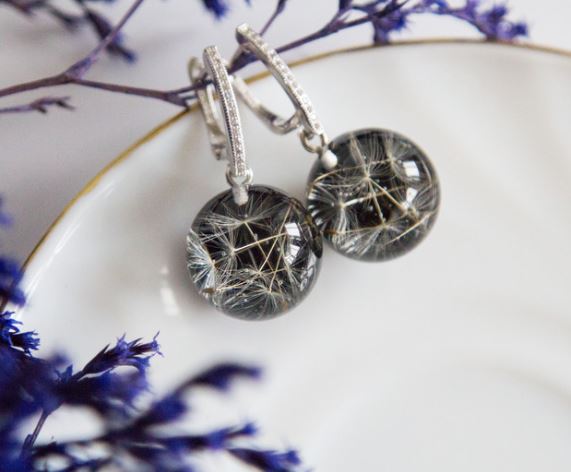
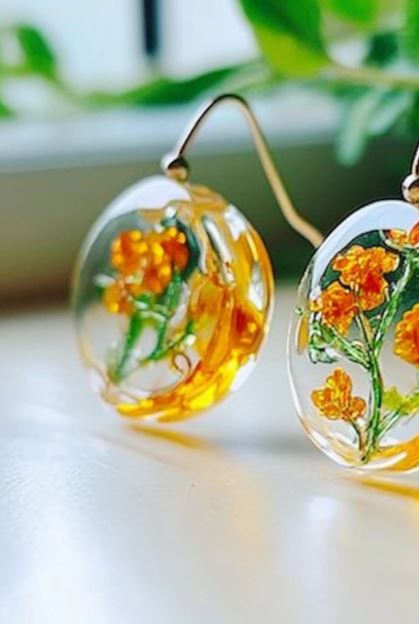
8. Embedding objects in resin
One of the most fun aspects of resin jewelry is to encapsulate objects and memories within your creations.
Whether it’s a delicate flower, a cherished keepsake, or any tiny item with sentimental value, embedding objects in resin can transform your jewelry into deeply personal and meaningful pieces of wearable art.
Selection of Inclusions
The first step in embedding objects in resin is choosing the items you want to encapsulate.
This can range from dried flowers, leaves, feathers, or small gemstones to items of sentimental value, like locks of hair, small photographs, pieces of jewelry or antique plates that are broken up into smaller pieces.
When making epoxy jewelry, these inclusions add a personal touch, making each piece truly unique.
Object Preparation
Prepare the objects you intend to embed. If you’re using organic materials like flowers or leaves, they must be dried and free of moisture to prevent them from rotting in the resin. Clean and polish other items to maintain their appearance.
Mold Choice
Select an appropriate mold to house your inclusions. Silicone molds are often favored for their flexibility, making it easier to release your jewelry pieces when the resin has cured. Depending on the design, you may require different mold shapes and sizes.
Layering and Positioning
Plan your design by deciding how you want to arrange and layer your inclusions within the mold. Take care when positioning the objects, as once the resin is poured, it’s hard to adjust them. If you have to, you can use your silicone mixing stick.
Pouring Resin
Following the manufacturer’s instructions, mix and pour the resin over your inclusions within the mold.
Pour it slowly to avoid trapping air bubbles, and use a toothpick or a small tool to arrange the inclusions within the resin so they are evenly distributed.
Curing
Allow the resin to cure for the recommended time. During this period, the resin hardens and becomes transparent, beautifully showcasing your embedded objects.
Demolding and Finishing
Gently demold your piece once the resin has fully cured. Be patient and careful to prevent any damage to the resin or the inclusions. After demolding, you may need to sand and polish the edges and surfaces.
Embedding objects in resin not only adds an artistic dimension to your jewelry but also enables you to preserve cherished memories and keepsakes.
9. Resin casting and embedding
Resin casting and embedding are fundamental techniques in resin jewelry crafting. You can create intricate designs, preserve delicate elements, and add depth to your pieces.
Materials and Tools
Start by acquiring high-quality materials and tools. Choose the appropriate resin for your project and gather all the necessary supplies, such as stirring sticks, measuring cups, and safety gear.
Design and Planning
Plan your design carefully before you start casting and embedding. Consider the arrangement of inclusions, the number of layers, and any special effects you want to have. Whenever I have a winner, I write what I did down and make sure I take a photo so I can do it again.

Mixing and Pouring Resin
Accurate resin mixing is important. Follow the manufacturer’s instructions for your specific resin type and use measuring tools for precise ratios.
Stir the resin thoroughly, but avoid vigorous stirring, which can introduce air bubbles. When pouring, do so in a controlled and consistent manner to minimize the risk of bubbles and even distribution.
Embedding Objects
If embedding objects such as flowers, charms, or beads, carefully position them in the mold as per your design plan. This stage requires precision, as adjustments after pouring resin can be challenging. Take your time to get the desired arrangement.

Layering and Timing
Creating multi-layered designs is a common practice in resin casting and embedding. Allow each resin layer to partially cure before adding the next.
This prevents colors from bleeding or inclusions from sinking to the bottom. Pay attention to timing, as different resins may have varying pot times and curing times.
Bubble Control
A heat gun or torch is your go-to tool for removing bubbles that appear on the resin’s surface. Move the heat source continually and at a safe distance to prevent overheating.
Demolding and Finishing
After the resin has cured, carefully demold your piece. Use sandpaper, files, or rotary tools to shape and refine your jewelry. Pay attention to edges and surfaces, striving for a smooth, professional finish.
Continuous Learning
The key to perfecting resin casting and embedding is practice and learning from each project. Don’t be discouraged if your jewelry doesn’t turn out so great. Just keep practicing.

Over time, you’ll develop an intuition for timing, bubble control, and design execution that will result in better resin jewelry.
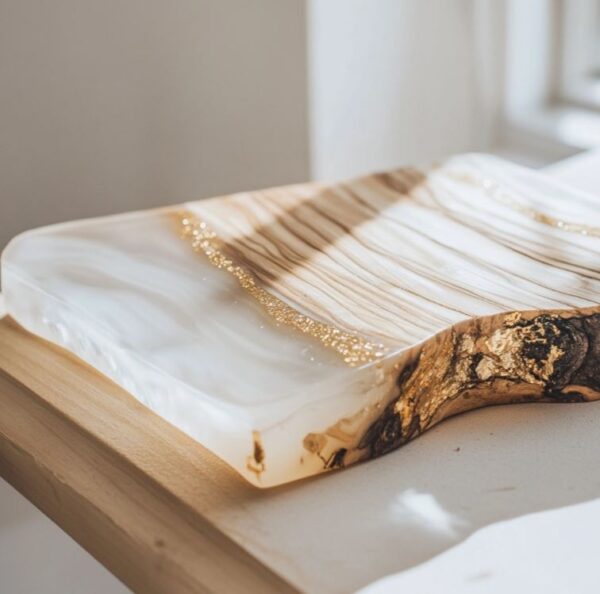
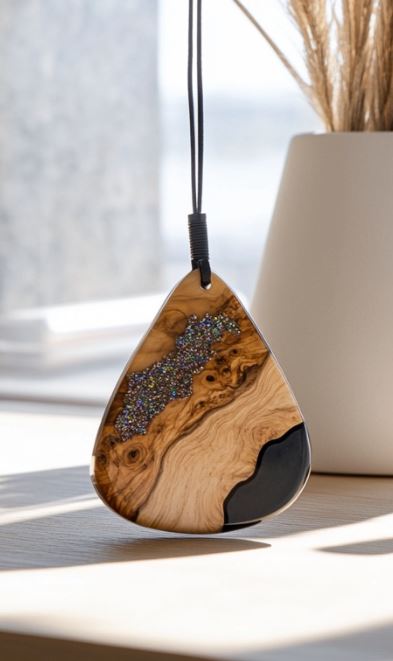
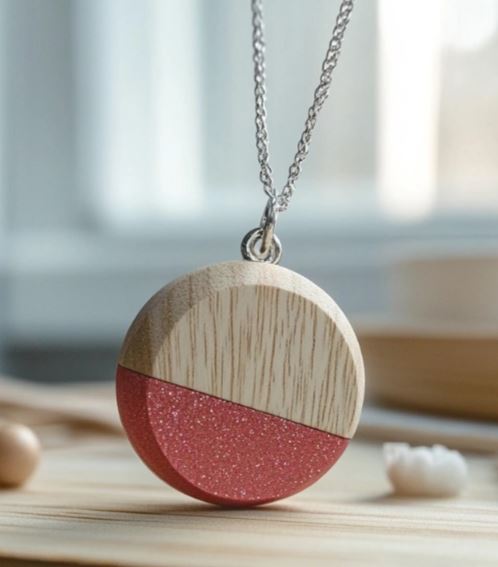
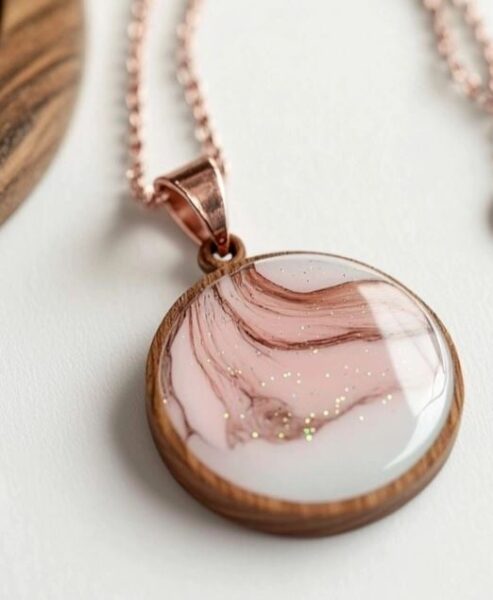
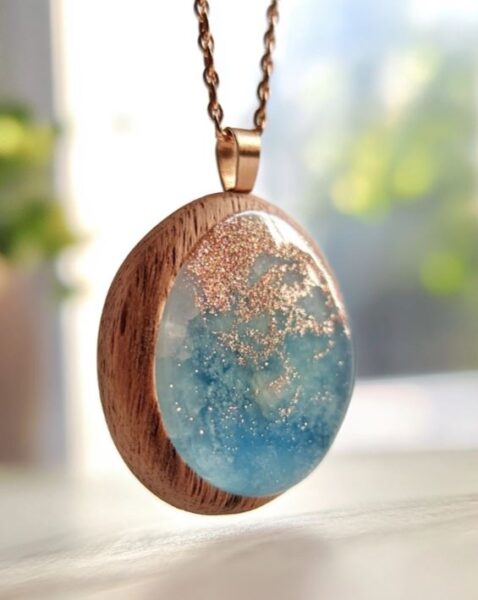
10. Resin and wood jewelry
Creating resin and wood jewelry allows you to celebrate the beauty of both elements.

Wood Selection
Begin by selecting the wood for your jewelry pieces. Different types of wood offer distinct grains, colors, and textures.
Popular choices include maple, oak, walnut, and exotic woods like padauk or zebrawood. Wood should be dry and well-seasoned to prevent warping or cracking when encapsulated in resin.
Cutting and Shaping
Cut the wood into the desired shapes for your jewelry, such as pendants, earrings, or bangles. You can use saws, carving tools, or even wood blanks to create your pieces. Sand and smooth the edges to so they are comfortable to wear.
Preparing the Wood
To prevent any moisture-related issues, seal the wood by applying a thin layer of epoxy resin or a wood sealant to the surfaces that will come into contact with the resin. This step will also help the resin adhere securely to the wood.
Here are some of the best resins for stabilizing wood.
Mold Selection
Choose molds that complement the shape and size of your wood pieces. Silicone molds with various shapes, including those designed for pendants or cabochons, work well for this purpose.
Mixing and Pouring Resin
Follow the manufacturer’s instructions for mixing and pouring resin. Pour a small amount into the mold, place your prepared wood piece, and then pour additional resin to cover the wood.
This process will encapsulate the wood and create a clear, protective layer.
Design Freedom
Resin and wood jewelry offers limitless design possibilities. Experiment with different layering techniques, such as creating colorful backgrounds, adding embedded objects, or blending multiple layers of resin.
Sanding and Polishing
Once your resin has cured, gently demold your jewelry pieces. Sand and polish the surfaces for a high-gloss finish. Take care to smooth the edges for a professional appearance.
Assembling Your Jewelry
After your resin and wood components are finished, assemble your jewelry by adding findings like jump rings, clasps, and chains.
Personalization
Since you are working with wood, try personalizing your jewelry by engraving, wood burning, or painting on the wood surfaces. These additional touches can make your pieces truly unique.
Resin and wood jewelry offers a beautiful contrast between the warmth and natural allure of wood and the glossy, protective layer of resin.
11. Simple jewelry projects
If you’re new to resin jewelry crafting, there’s no need to be overwhelmed. Starting with easy projects is an excellent way to learn the basics and gain confidence in your skills. Here are some simple resin jewelry projects that are perfect for beginners.
Pendant Necklaces With Resin
Materials Needed
Resin, pendant molds, jump rings, and a necklace chain.
How to Start
Begin with clear resin and small, flat pendant trays. Mix the resin according to the manufacturer’s instructions, pour it into the mold, and let it partially cure.
Add small inclusions like dried flowers, glitter, or small beads. Once the resin is fully cured, attach an eye screw and a jump ring to hang the pendant on a necklace chain.

Resin Stud Earrings
Materials Needed
Resin, silicone earring molds, earring posts, earring backs, and optional coloring agents.
How to Start
Earring molds come in various shapes and sizes. For beginners, select simple geometric shapes. Mix and tint the resin as desired, and pour it into the earring molds.
Place earring posts in the resin while it’s still liquid. After curing, attach earring backs, and your stud earrings are ready to wear.

Resin Keychains
Materials Needed
Resin, keychain molds and optional coloring agents.
How to Start
Keychain molds are often simple shapes or customizable blanks. This kit has the silicone molds and jumprings.

Resin Ring Dish
Materials Needed
Resin, silicone mold, and optional coloring agents.
How to Start
Create a charming resin ring holder to keep your jewelry organized. Mix and tint the resin to your liking and pour it into the silicone mold.
Once cured, remove the dish from the mold and use it to store rings and small jewelry items.

Remember, as a beginner, carefully follow the manufacturer’s instructions for your chosen resin. Start with clear, low-odor resins for a more manageable experience.
12. Common resin jewelry making mistakes
Resin jewelry making can be a rewarding and creative, but it’s also prone to common mistakes that can be frustrating for beginners and experienced crafters alike.
To help you avoid these pitfalls, here are some tips to for a smoother and more successful resin jewelry-making experience.
Read and Follow Instructions
- Mistake: Ignoring or misinterpreting the manufacturer’s instructions for your chosen resin.
- Solution: Carefully read and follow the instructions provided with your resin, including the recommended mixing ratios, curing times, and safety precautions.
Measure Accurately
- Mistake: Inaccurate measurements when mixing resin components.
- Solution: Use digital scales or graduated measuring cups for precise measurements. Follow the recommended ratios for your resin.
Avoiding Bubbles
- Mistake: Failing to remove air bubbles in the resin and mixing air into the resin.
- Solution: Use a heat gun or a torch to gently pass over the resin surface to release air bubbles. Keep the heat source moving to prevent overheating. Do not mix any air into the resin while mixing.
Layering and Timing
- Mistake: Pouring resin layers too quickly without allowing sufficient curing time, which can cause layers to blend or deform.
- Solution: Allow each resin layer to partially cure before adding the next layer. Follow the manufacturer’s recommendations for timing.
Inclusion Arrangement
- Mistake: Displacing or shifting embedded objects while pouring resin.
- Solution: Plan your inclusion arrangement carefully and use tweezers or a toothpick to adjust their position before the resin sets.
Mixing Coloring Agents
- Mistake: Overmixing pigments and dyes, leading to undesirable color outcomes or excessive air bubbles. Adding too much colorants can cause the resin to seize up.
- Solution: Stir coloring agents gently and avoid overmixing. Take time to experiment with color combinations.
Safety Precautions
- Mistake: Neglecting safety gear like gloves and eye protection, resulting in skin contact or eye exposure to resin.
- Solution: Always wear appropriate personal protective equipment when working with resin, and work in a well-ventilated area.
Demolding Carefully
- Mistake: Rushing the demolding process, which can damage the resin or the mold.
- Solution: Take your time when demolding, gently flexing silicone molds and using a soft touch to avoid damaging your jewelry pieces.
Practice and Patience
- Mistake: Expecting perfection from the start.
- Solution: Understand that resin jewelry making is a craft that improves with practice. Don’t be discouraged by early mistakes, as they provide valuable learning experiences.
By paying close attention to these common pitfalls and implementing the solutions, you can enjoy a more successful and satisfying journey in creating stunning resin jewelry.
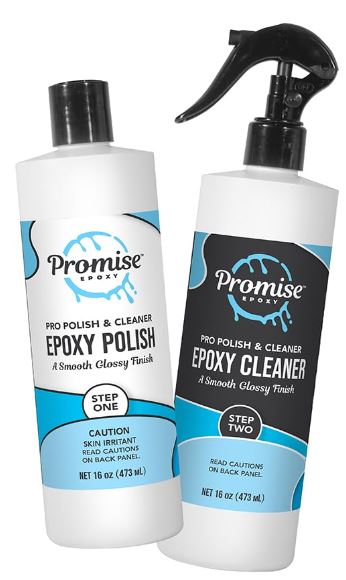
13. How to polish resin jewelry
Getting a professional finish on your resin jewelry pieces involves polishing, and applying finishing touches. This final stage of the crafting process will make sure your creations are not only beautiful but also smooth and durable.
Here’s how to polish your resin jewelry.
Polishing
A soft cloth or buffing wheel. You can get a high-gloss finish by using micro fiber cloths or polishing compounds.
Use a soft cloth or a buffing wheel to apply the compounds or pads in circular motions. If you’re using a rotary tool, be cautious not to overheat the resin.
The best polish for epoxy resin jewelry is this resin polishing kit.
Inspection
After the polishing process, carefully inspect your resin jewelry for any remaining imperfections. If you notice any areas that still need work, fix those up.
You can cover up imperfections with more resin, embellishments or using gold leafing pens.
Assembling
Assemble your jewelry pieces by attaching findings such as jump rings, clasps, earring hooks, or necklace chains. Be sure to secure these findings well to so that they do not fall off. One way to do this is with UV resin or e-6000.
The smooth, glossy surface not only enhances the beauty of your creations but also ensures they stand up to the test of time. With practice and attention to detail, you’ll develop the skills needed to get a perfect finish on all your resin jewelry projects.
14. Popular types of resin jewelry to make
Pendant Necklaces
These are versatile and highly customizable, with various shapes, colors, and embedded inclusions to suit different styles.
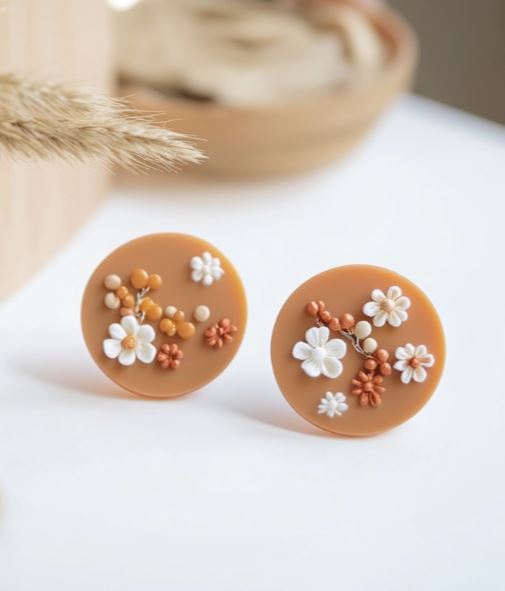
Earrings
Resin earrings, including studs, dangles, and hoops, offer endless possibilities for design and color variations.
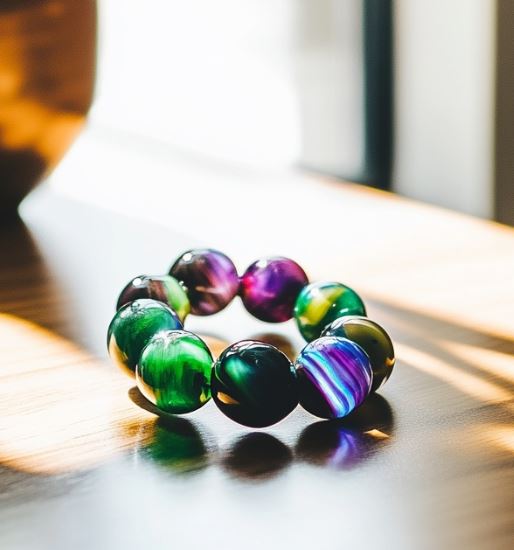
epoxy Resin Bracelets
These can be bangles, cuffs, or charm bracelets, allowing for personalization and a mix of resin and inclusions.
artisan Rings
Resin rings can be simple and elegant, or they can feature embedded objects and intricate designs.
Brooches and Pins
Brooches and pins can be made with resin and often feature intricate designs or themes.
Hair Accessories
Hairpins, barrettes, and combs made with resin and embedded elements have gained popularity for their unique and decorative designs.
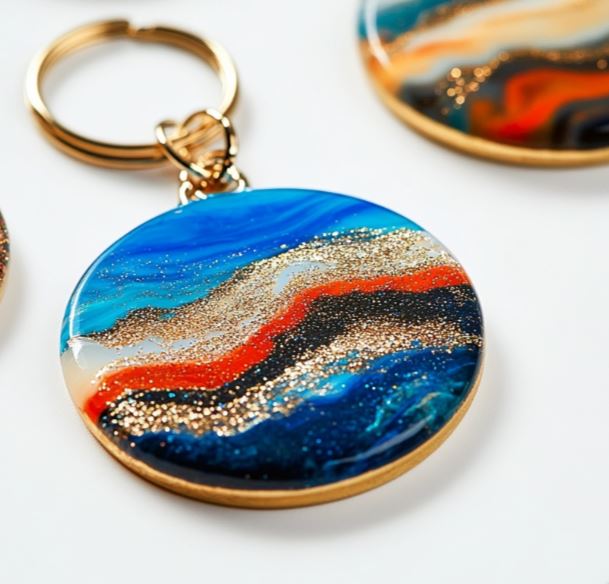
Resin Keychains and Bag Charms
These small and affordable resin creations are popular for gifting and personal use.
Cufflinks
Custom-made cufflinks, featuring personalized designs, are often sought after as gifts for special occasions.
Bangle Bracelets
These are typically thicker than traditional bracelets and offer ample space for artistic designs and embedded elements.
Wedding Brooch Bouquets
Bridal and event brooch bouquets made with resin elements have become fashionable and long-lasting alternatives to traditional flower bouquets.
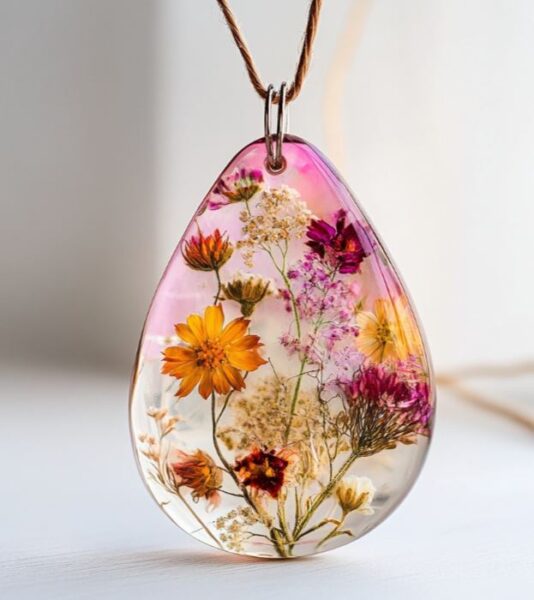
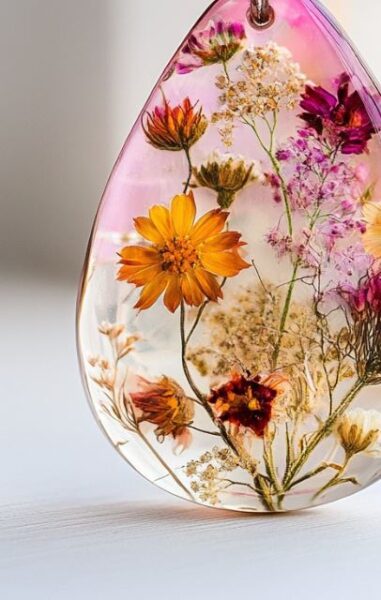
Pendants with Inclusions
These pendants often feature objects like flowers, shells, or gemstones embedded in the resin, creating stunning, nature-inspired jewelry.
Stud Earrings with Inclusions
These pendants often feature objects like flowers, shells, or gemstones embedded in the resin, creating stunning, nature-inspired jewelry.
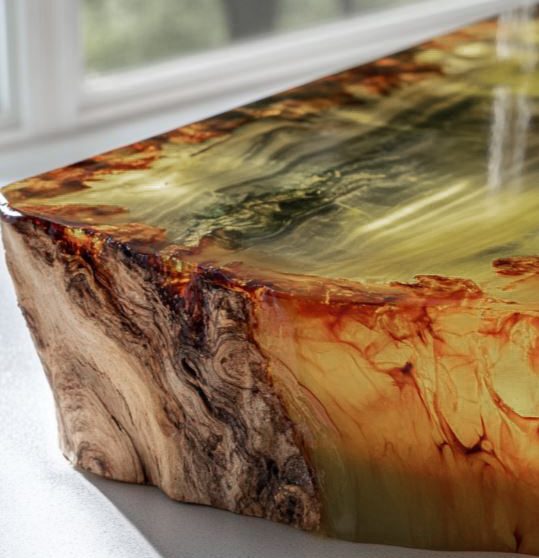
Geode Art Jewelry
Inspired by the mesmerizing patterns in geodes and agate crystals, these pieces incorporate intricate layering and crystal-like formations.
Wood Jewelry
Combining resin and wood, these pieces merge natural and synthetic elements to create unique, earthy designs.
Abstract Art Jewelry
This category includes freeform, abstract, and experimental designs that allow artists to express their creativity and imagination.
15. Resin jewelry business ideas
If you’re passionate about crafting resin jewelry and want to transform your hobby into a profitable venture, here’s a step-by-step guide on how to turn your resin jewelry-making skills into a thriving business.
I go into this in more detail in this article about how to start your own resin business.
Master Your Craft
Before starting a business, have a solid grasp of resin jewelry making. Practice your skills, experiment with various techniques, and refine your craftsmanship to produce high-quality pieces.
Market Research
Research your target market and identify your niche within the resin jewelry industry. Analyze competitors, discover trends, and understand your potential customers’ preferences and needs.
Business Plan
Create a comprehensive business plan outlining your business goals, target audience, pricing strategy, budget, marketing plan, and financial projections. A well-thought-out plan will serve as your roadmap for success. Etsy has many business plan templates to help you get started.
Sourcing Materials
Establish reliable sources for resin, molds, inclusions, and other materials. Consider bulk purchasing to reduce costs and maintain consistent quality.
Product Line
Create a product line that caters to different tastes and styles. Include various designs, sizes, and customization options to appeal to a broader customer base.
Pricing Strategy
Determine your pricing strategy by considering material costs, labor, overhead, and the competitive market. Make sure your prices cover your expenses and provide a reasonable profit margin.
Online Presence
Set up an e-commerce website or use popular platforms like Etsy or Shopify to showcase and sell your jewelry. Include high-quality product photos, detailed descriptions, and an easy checkout process.
Social Media Marketing
Utilize social media platforms to build your brand and connect with potential customers. Share captivating images and videos of your jewelry, engage with your audience, and run targeted advertising campaigns.
Branding
Develop a memorable brand that reflects your unique style and values. Your branding should be consistent across your website, social media, packaging, and any promotional materials.
Quality Assurance
Maintain consistent quality in your jewelry pieces. Don’t send out any jewelry that is not the best you can make, so that customers receive the best products every time.
Customer Service
Provide exceptional customer service by responding to inquiries promptly, addressing concerns, and ensuring a positive buying experience. Happy customers are more likely to become repeat buyers and advocates for your brand.
Inventory Management
Keep track of your inventory to avoid overstocking or running out of popular items. Efficient inventory management helps you meet demand and optimize your profits.

Marketing and Promotion
Continuously market your products through various channels, including email marketing, collaborations, online advertising, and participation in craft fairs or markets. Offer promotions and discounts to attract new customers.
Growth and Scaling
As your business grows, consider scaling by hiring additional help, expanding your product line, or exploring wholesale opportunities with boutiques and retailers.
Customer Feedback
Pay attention to customer feedback and use it to improve your products and services. Happy customers often provide valuable insights for business growth.
Starting a resin jewelry business takes dedication, hard work, and continuous learning.
Stay current with market trends and customer preferences to create and sell jewelry that resonates with your target audience.
16. Is making resin jewelry profitable?
The profitability of making resin jewelry can vary greatly depending on various factors, including your skill level, the quality of your work, your marketing efforts, and the current demand for your products.
Here are some key points to consider when evaluating the profit potential of a resin jewelry business.
Quality of Craftsmanship
High-quality, well-crafted resin jewelry is more likely to attract customers and command higher prices. Continuous improvement of your skills and attention to detail is important so keep learning about new techniques on YouTube.
Market Demand
The demand for resin jewelry can vary by region and trends. Staying informed about market trends and catering to popular styles can boost your sales.
Unique Designs
Creating unique and distinctive designs can set your jewelry apart from the competition and make your products more appealing to customers.

Materials and Costs
Carefully manage your material costs, and find reliable sources for supplies. Efficient production processes can help maximize your profits.
Pricing Strategy
Pricing your resin jewelry appropriately is essential. Consider factors like material costs, labor, overhead, and desired profit margins when setting your prices.
Marketing and Branding
Marketing and branding can make a significant difference. Utilize social media, e-commerce platforms, and craft fairs to promote your products and reach a wider audience.
Competition
Assess the level of competition in your niche. Identifying a unique selling point and a target market can help you compete.
I have a helpful article on the best resin jewelry shops on Etsy. These shops are on the top of their game and show that resin jewelry sales are alive and well.
Customer Base
Building a loyal customer base and focusing on repeat business can provide a steady stream of income.
Time and Effort
Keep in mind that the profitability of a resin jewelry business often depends on the time and effort you invest. Part-time businesses may have different profit expectations than full-time enterprises.
Business Expenses
Be prepared to handle various expenses, including materials, marketing, website maintenance, packaging, and business licenses or permits. You can use Google Sheets to track your inventory or use an accounting software to keep track.
Trends and Seasonality
Consider how trends and seasonal changes may affect your business. Some designs may be more popular during certain times of the year.
While many artisans have found success and profitability in the resin jewelry business, it’s important to approach it with a realistic understanding of the market, competition, and the effort required for marketing and production.
Starting small, building your skills, and gradually expanding your business can be great at bringing in some extra cash. Remember that it can take time to establish a business.
17. Does resin jewelry turn yellow?
Resin jewelry has the potential to turn yellow over time. Whether or not it will change color depends on several factors, including the type of resin used, exposure to UV light, and the quality of the resin and pigments.
Type of Resin There are different types of resin, including epoxy resin and UV resin. Epoxy resin, which is commonly used for jewelry making, is more susceptible to yellowing when exposed to UV light over time. UV resin is typically less prone to yellowing.
UV Exposure Exposure to ultraviolet (UV) light, such as sunlight or indoor fluorescent lighting, is a common factor that can cause resin to yellow. Over time, UV rays can initiate a chemical reaction in the resin that results in a yellowish tint.
Quality of Resin The quality of the resin you use can also impact its resistance to yellowing. Higher-quality resins are often formulated to resist yellowing and maintain clarity over an extended period.
Pigments and Additives The type and quality of pigments, dyes, or other additives used in resin can influence the likelihood of yellowing. Some pigments and dyes are more stable and less prone to fading or changing color.
Minimize Yellowing In Resin
- Use UV-resistant resin if you’re concerned about yellowing.
- Store your resin jewelry in a cool, dark place when not in use to minimize exposure to UV light.
- Avoid excessive heat, as high temperatures can also accelerate yellowing in some resins.
- Consider using pigments and additives that are known for their resistance to fading and yellowing.
See this guide: Why is my epoxy resin turning yellow.
It’s important to note that even with precautions, epoxy resin may still yellow to some extent over a long period.
However, UV-resistant or UV-stabilized resins are less prone to yellowing and are a good choice for preserving the clarity and color of your resin jewelry over time.
18. Do you have to seal resin jewelry?
No, you generally do not need to seal resin once it has cured. Resin, especially epoxy resin, is designed to provide a protective and glossy finish on its own, making additional sealing unnecessary in most cases.
However, if your jewelry contains delicate inclusions or porous materials like dried flowers or paper, it’s advisable to protect them from moisture by sealing them before casting in resin.
The resin may not fully penetrate and seal such materials during the curing process and can also cause bleeding of inks if using paper.
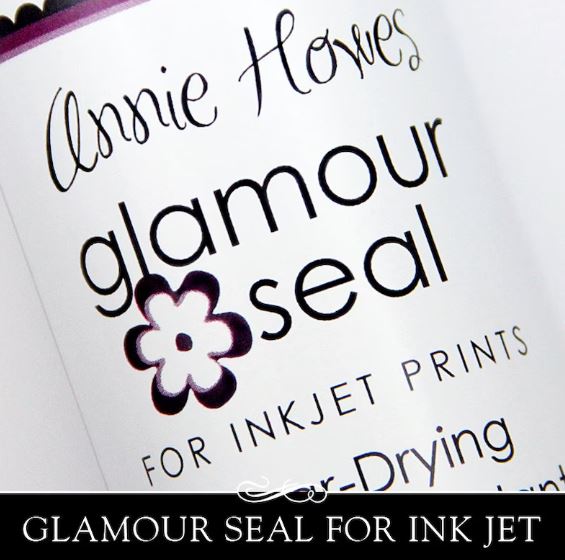
A good paper sealer is the Annie Howes. Always do a test to make sure it’s compatible with your inks. I have used this many times and have never had inks run using this product.
19. Can you shower with resin jewelry?
Showering with resin jewelry is generally not recommended, especially if the jewelry is made with epoxy resin. While epoxy resin is water-resistant to some extent, prolonged exposure to water, heat, and moisture can potentially affect the jewelry’s appearance and structural integrity.
Here are some reasons to avoid showering with resin jewelry.
Water Ingress
Over time, water can seep into small imperfections in the resin, which may lead to clouding or a hazy appearance.
Heat and Steam
Hot water and steam from showers can accelerate the release of volatile organic compounds (VOCs) from the resin, which may lead to a change in the jewelry’s appearance or the release of unpleasant odors.

Chemicals and Soaps
The chemicals and soaps commonly used in showers can have varying effects on the resin, potentially causing discoloration, dullness, or other changes.
Mechanical Stress
Repeated exposure to water and soap can weaken the adhesion of the resin to any inclusions or attachments, making them more susceptible to detachment or damage.
One time I was swimming in a salt water pool and after a few weeks the clasp on my necklace was turning a different color. So I don’t recommend swimming with jewelry on.
To extend the lifespan and maintain the appearance of your resin jewelry, it’s best to remove it before showering, swimming, or engaging in activities where it may come into contact with water.
If you want to make resin jewelry that is more water-resistant, consider using a UV resin, which is generally less susceptible to water-related issues. However, even with UV resin, it’s still advisable to remove the jewelry before showering as well.
20. Do you need a uV light for resin jewelry?
UV light is commonly used in the resin jewelry-making process, but whether you need it depends on the type of resin you’re using and the specific techniques you employ.
There are two primary types of resin used in jewelry making: epoxy resin and UV resin, and their curing methods differ:
Epoxy Resin
Epoxy resin typically cures through a chemical reaction between two components, the resin and the hardener.
This curing process is not UV-dependent, and epoxy resin hardens at room temperature or with the application of heat (usually referred to as a heat cure). UV light is not necessary for curing epoxy resin.
using UV Resin
UV resin, as the name suggests, requires exposure to ultraviolet (UV) light to cure. This type of resin is not activated until it is exposed to UV light, usually from a UV lamp or sunlight.
UV resin is advantageous for quick, on-the-spot curing because it hardens rapidly when exposed to UV light.
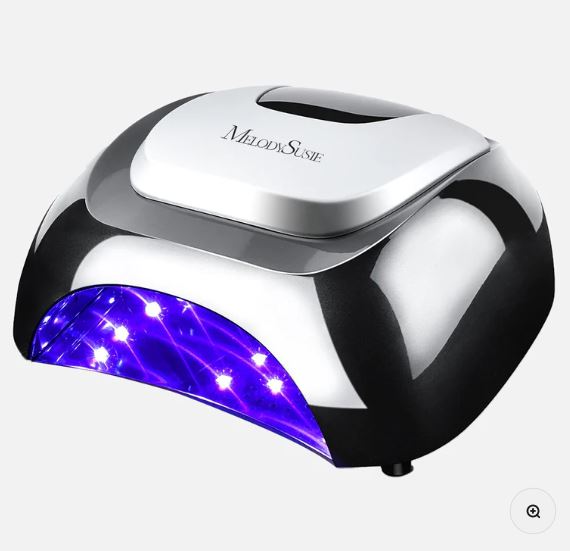
This is a Good Lamp To Cure UV Resin
- Quick curing
- Long lasting bulbs
- 48 Watts
- Unique timer button design
The choice of resin (epoxy or UV) largely depends on your preferences, the specific techniques you want to use, and the desired curing times for your jewelry projects.
Epoxy resin is versatile and can be used in various applications without the need for UV light, while UV resin is known for its quick curing capabilities when exposed to UV light.
21. How do you keep resin jewelry shiny?
To keep your resin jewelry shiny and looking its best, you can follow these tips and techniques for maintaining its luster:
Proper Cleaning
Regularly clean your resin jewelry using a soft, lint-free cloth, microfiber cloth, or a gentle jewelry cleaning cloth. This will help remove dust, fingerprints, and minor surface blemishes that can dull the shine.
Mild Soap and Water
For more thorough cleaning, you can use a mild soap (such as dish soap) and warm water. Gently scrub the jewelry with a soft brush or your fingers, rinse with clean water, and pat dry with a soft cloth. Avoid using abrasive materials that may scratch the resin.
Buffing
For resin jewelry that has lost some of its shine over time, you can buff it to restore its gloss. Use a jewelry polishing cloth or a soft cloth to gently buff the resin in circular motions. This can help eliminate minor scratches and enhance the shine.
UV Protection
If your jewelry is made with epoxy resin and is prone to yellowing when exposed to UV light, take steps to protect it from sunlight and indoor UV exposure. Storing your jewelry in a cool, dark place can help maintain its clarity and shine over time.
Resin-Specific Care
Be mindful of the type of resin you’re working with and any specific care instructions provided by the manufacturer. Different resins may have unique maintenance requirements.
Avoid Harsh Chemicals
Do not expose your resin jewelry to harsh chemicals, such as acetone, bleach, or strong cleaning agents, as they can damage the resin and affect its shine.
Wear with Care
Be cautious about exposing your resin jewelry to rough handling, extreme temperatures, or abrasive surfaces, as these factors can contribute to scratches and a loss of shine.
Proper Storage
Store your resin jewelry separately in a soft jewelry pouch or individual compartments to prevent scratching and maintain its shine.
By implementing these tips and giving your resin jewelry some care and attention, you can keep it looking shiny and vibrant for a long time. Regular cleaning and maintenance are key to preserving the beauty and luster of your resin jewelry.
22. Is resin for jewelry low odor?
Not all resin is low odor. I’ve have used some resins that I could not even stand and I will never recommend those on this blog.
Resin formulated specifically for jewelry making is typically low odor, making it suitable for crafting projects in indoor environments without producing strong, unpleasant fumes.
One of the best resins that has a low odor is ArtResin.

This low-odor feature makes it more comfortable for jewelry makers that are working with resin constantly.
Making resin jewelry is a fun way to get creative, and it’s perfect for beginners. You can play with bold colors, add glitter, or keep it simple and clear. There’s no wrong way to do it. Just take your time, enjoy the process, and don’t worry if it’s not perfect at first. Each piece you make helps you get better.
So, how do you make resin jewelry? Leave your tips in the comments below.