How To Make A UV Resin Domino Pendant
Creating a domino pendant with UV resin is a fun and simple project for beginners. UV resin is a special type of resin that cures quickly under UV light, making it great for smaller projects like jewelry. This resin allows you to create custom designs with minimal wait time, unlike other types of resin.
Unlike epoxy resin, which requires mixing two components and waiting hours for it to cure, UV resin is a single-component product that hardens in just a few minutes when exposed to UV light.
This makes UV resin a great choice for quick and easy crafting projects. It’s good for those who want to see fast results without the long curing times associated with epoxy resin.
In this tutorial, I’ll show you the steps to make your own domino pendant using UV resin.
From choosing your design to curing your resin, I’ll cover everything you need to know to create a beautiful piece of jewelry. Let’s get started and have some crafting fun with UV resin!
How To Make A Resin Domino Pendant
Supplies You Will Need
- UV Resin
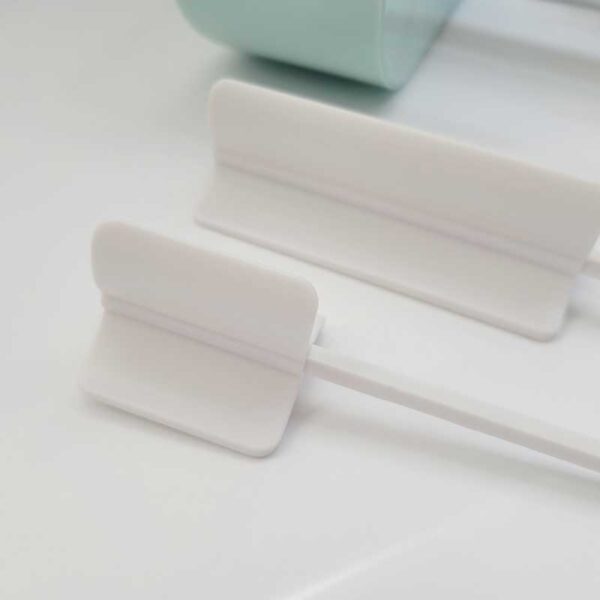
- Resin Cure Lamp
- Domino’s
- Acrylic Paints
- Small Stones & Glitters
- Jewelry Bails
- E6000 Glue
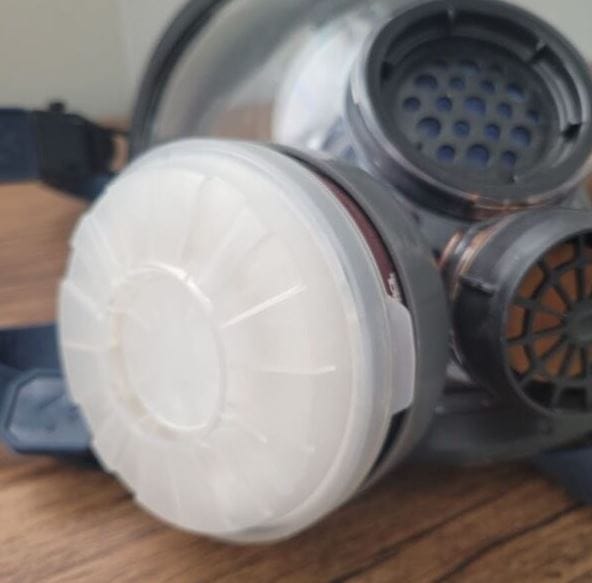
- Proper Respirator & Nitrile Gloves
Step 1
Start by selecting your resin for this project. UV resin is ideal because it cures quickly under a UV lamp, allowing you to complete your pendant in minutes. Make sure to choose a high-quality UV resin to ensure a clear, durable finish for your domino pendant.
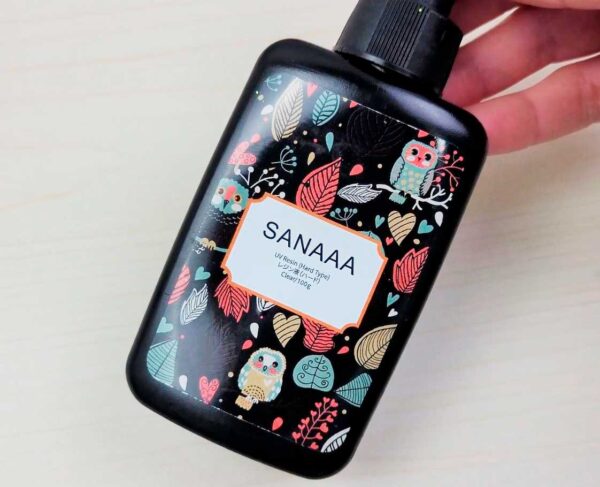
For this resin pendant, I’m using Sanaaa resin, but you can use any UV resin you have. We also have a list of the best UV resins for beginners for more brands.
Step 2
Give the domino a good wipe with rubbing alcohol or wash it with some soap and water to get rid of any dust or oils. This will help the resin stick better and give you a smooth finish. Just make sure it’s completely dry before you start pouring the resin.
Step 3
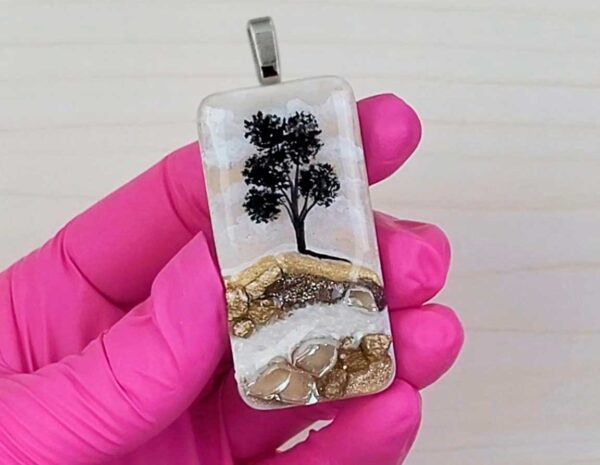
Now it’s time to get creative with your domino pendant! Use acrylic paints or paint pens to draw designs, patterns, or even tiny pictures on the domino.
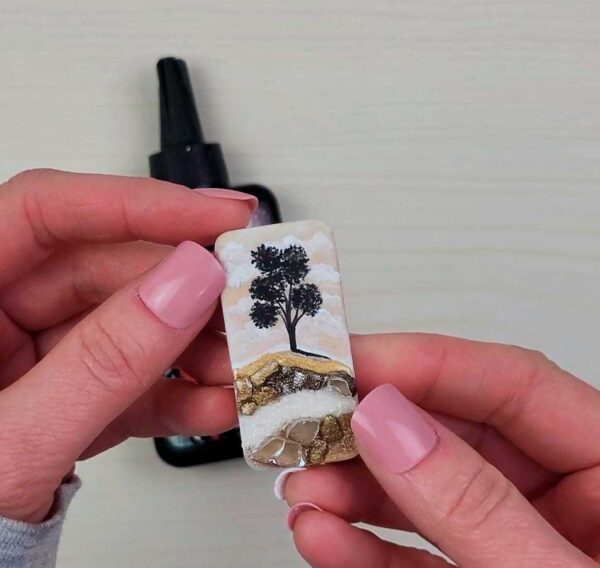
You can add small rocks, glitter, or any other embellishments you like to make your piece unique. Have fun with it and let your imagination run wild!
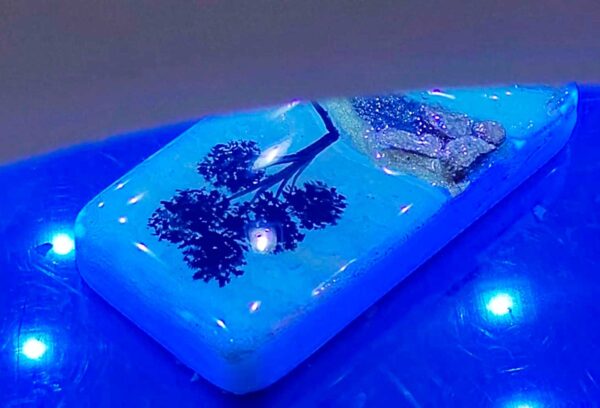
On this domino I hand painted a cute tree using the acrylic paints. Then I went ahead and added some fireglass and rocks and set that with the resin so that nothing moves.
Step 4
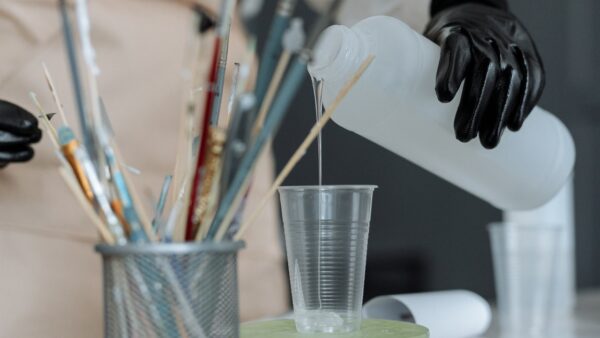
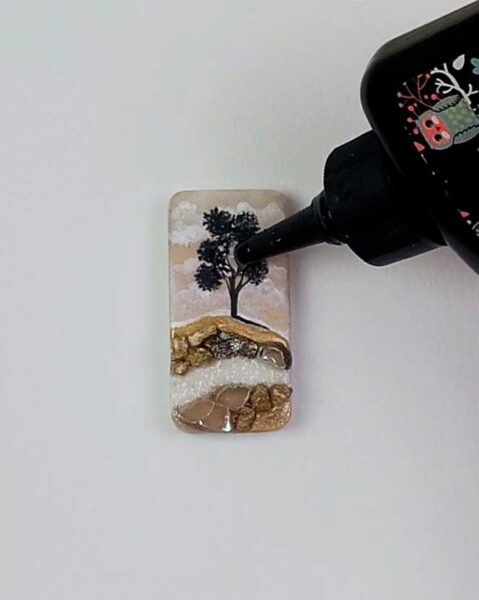
Put on your respirator and gloves and carefully pour the UV resin onto the surface of the domino, making sure to go slow so it doesn’t spill over the edges.
UV resin is perfect for this because it naturally domes, creating a nice, even layer that stays in place. Take your time to spread it gently, letting the resin settle smoothly across your design. See more about doming resin and uses.
Step 5
Using a toothpick, gently guide the resin toward the edges of the domino, being careful not to let it spill over.
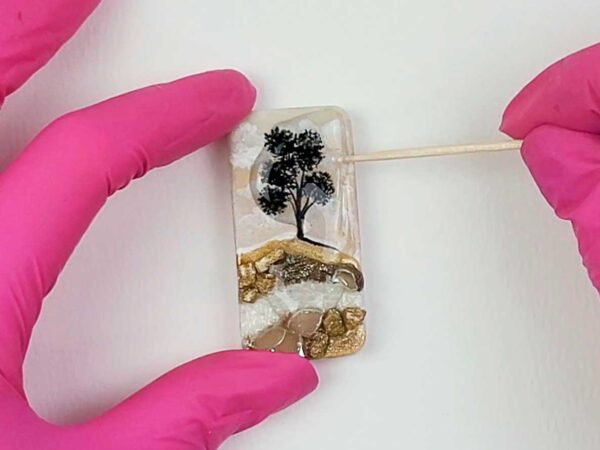
This step helps so that the resin covers your design completely while keeping a nice, clean edge. Go slowly and patiently, making sure the resin stays within the lines for a perfect finish.
Step 6
Hold the domino upside down for about 10 seconds to let the resin spread evenly across the surface.
This helps any excess resin flow back towards the center, preventing it from pooling on the edges. It’s a simple trick to get a smooth, even coat without any bumps or uneven spots.
Step 7
Place the pendant under a UV lamp and let it cure for 2 minutes. This will harden the resin and set your design, giving it a shiny, durable finish.
Make sure the pendant is positioned correctly so that the UV light reaches all areas evenly.
Step 8
Glue the jewelry bail to the back of the pendant using E6000 adhesive and let it dry completely. Once the glue is dry, add a small dab of UV resin around the bail to secure it even more.
Cure this final layer under the UV lamp to make sure the bail stays firmly in place.
And there you have it, your very own custom domino pendant! With just a few simple steps, you’ve created a unique piece of jewelry that’s all your own. And if you are wondering how to keep it clean, here is how to clean resin jewelry.
Enjoy wearing your new pendant or give it as a special gift, and don’t forget to share your creations with friends and family. Happy crafting!
More Resin Ideas